New! Render PlantUML diagrams directly inside GitHub
with our official browser extension —
No server. No tokens. No tracking. Zero permissions but clipboard. —
Try it out and let us know what you think!
Class diagram
A class diagram describes the static structure of a system: its classes, their attributes and methods, and the relationships between them. It's the most common UML diagram for documenting code organization and design. In PlantUML, the syntax mirrors what you'd write in a programming language, so attributes, methods, and visibility markers feel familiar. Relationships use the same arrow style as sequence diagrams.- Text in, diagram out. Declare classes, fields, and relationships in a few lines.
- Reads like code.
+,-,#for visibility,:for types,()for methods. - Annotate freely. Add notes, colors, and stereotypes without leaving the text.
 Declarative element
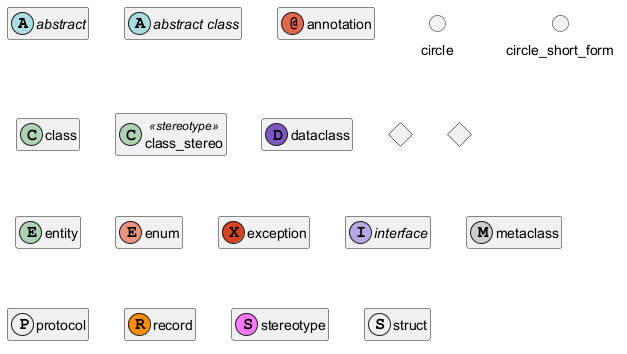
protocol and struct: GH-1028; for exception: GH-1056, QA-16258; for metaclass and stereotype: GH-1159, QA-16784; for record and dataclass: GH-2232]
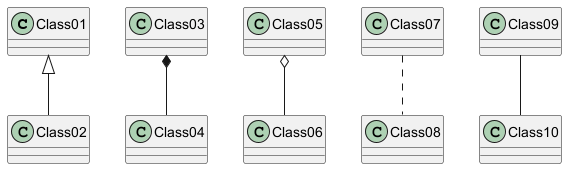
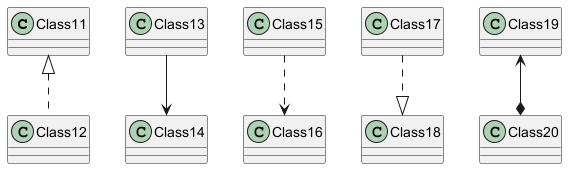
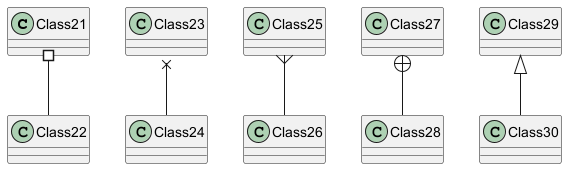
Relations between classes
Relations between classes are defined using the following symbols :
| Type | Symbol | Purpose |
| Extension |
<|--
|
Specialization of a class in a hierarchy |
| Implementation |
<|..
|
Realization of an interface by a class |
| Composition |
*--
|
The part cannot exist without the whole |
| Aggregation |
o--
|
The part can exist independently of the whole |
| Dependency |
-->
|
The object uses another object |
| Dependency |
..>
|
A weaker form of dependency |
-- by .. to have a dotted
line.
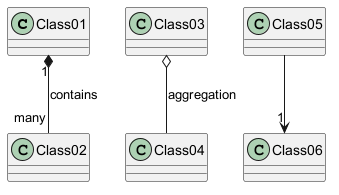
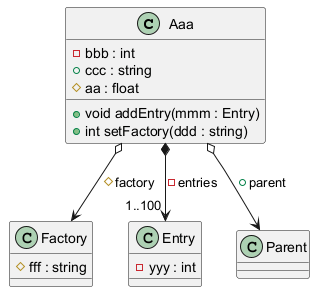
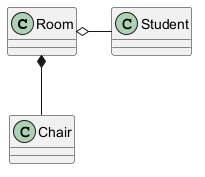
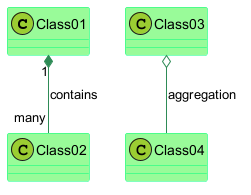
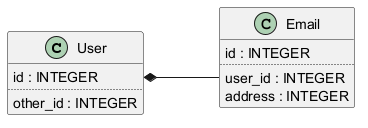
Knowing those rules, it is possible to draw the following drawings:
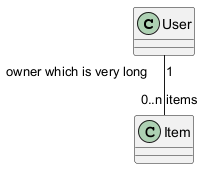
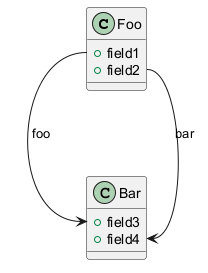
Label on relations
It is possible to add a label on the relation, using :, followed
by the text of the label.
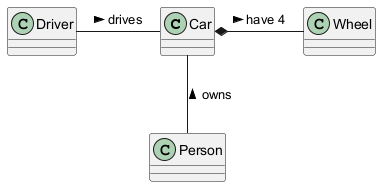
For cardinality, you can use double-quotes "" on each side
of the relation.
< or >
at the begin or at the end of the label.
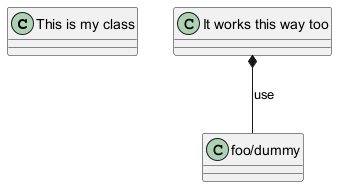
Using non-letters in element names and relation labels
If you want to use non-letters in the class (or enum...) display name, you can either :
- Use the
askeyword in the class definition to assign an alias - Put quotes
""around the class name
Starting names with $
Note that names starting with $ cannot be hidden or removed later, because hide and remove command will consider the name a $tag instead of a component name. To later remove such elements they must have an alias or must be tagged.

$ are valid, but to assign an alias to such element the name must be put between quotes "".
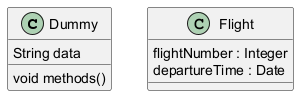
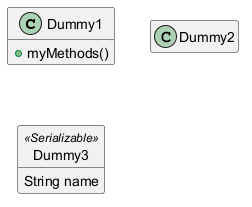
Adding methods
To declare fields and methods, you can use the symbol
: followed by the field's or method's name.
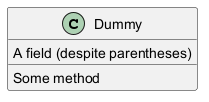
The system checks for parenthesis to choose between methods and fields.
{} all fields and methods.
Note that the syntax is highly flexible about type/name order.
{field} and {method} modifiers to
override default behaviour of the parser about fields and methods.
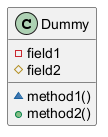
Defining visibility
Visibility for methods or fields
When you define methods or fields, you can use characters to define the visibility of the corresponding item:| Character | Icon for field | Icon for method | Visibility |
-
|

|

|
private
|
#
|

|

|
protected
|
~
|

|

|
package private
|
+
|

|

|
public
|
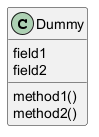
skinparam classAttributeIconSize 0 command :
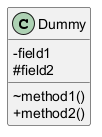
skinparam classAttributeIconSize 0.
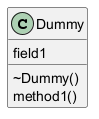
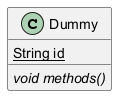
-, #, ~ or + characters such as a destructor in some languages for Dummy class ~Dummy(), escape the first character with a \ character:
Visibility for class
Similar to methods or fields, you can use same characters to define the Class visibility: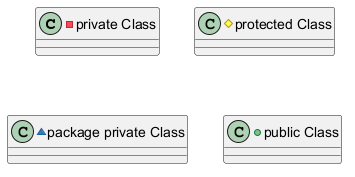
Visibility on compositions and aggregations
Abstract and Static
You can define static or abstract methods or fields using the {static}
or {abstract} modifier.
These modifiers can be used at the start or at the end of the line.
You can also use {classifier} instead of {static}.
Advanced class body
By default, methods and fields are automatically regrouped by PlantUML.
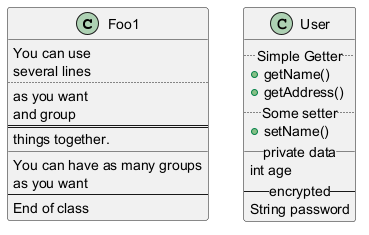
You can use separators to define your own way of ordering fields and methods.
The following separators are possible : -- .. == __.
You can also use titles within the separators:
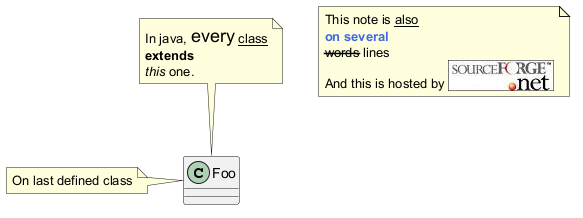
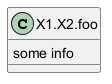
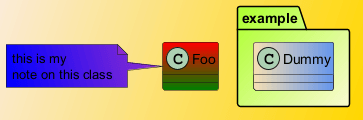
Notes and stereotypes
Stereotypes are defined with the class keyword, << and >>.
You can also define notes using note left of , note right of , note top of , note bottom of
keywords.
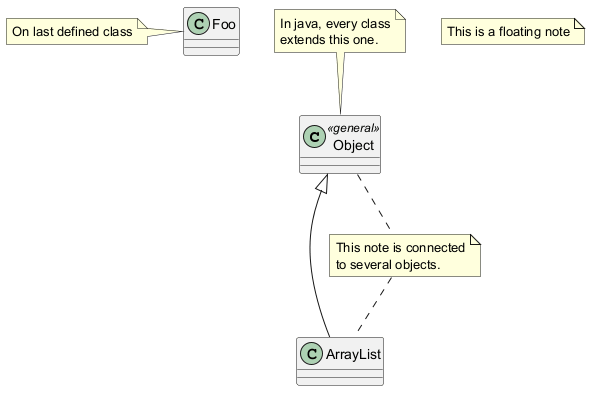
You can also define a note on the last defined element using note left, note right,
note top, note bottom.
A note can be also define alone with the note
keywords, then linked to other objects using the .. symbol.
More on notes
It is also possible to use few HTML tags (See Creole expression) like :
<b><u><i><s>,<del>,<strike><font color="#AAAAAA">or<font color="colorName"><color:#AAAAAA>or<color:colorName><size:nn>to change font size<img src="file">or<img:file>: the file must be accessible by the filesystem
note left, note right,
note top, note bottom.
Note on field (field, attribute, member) or method
It is possible to add a note on field (field, attribute, member) or on method.
⚠ Constraint
- This cannot be used with
toporbottom(onlyleftandrightare implemented) - This cannot be used with namespaceSeparator
::
Note on field or method
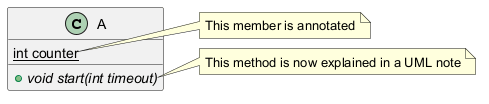
Note on method with the same name

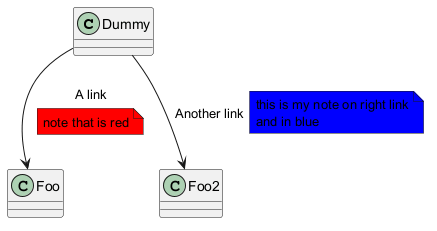
Note on links
It is possible to add a note on a link, just after the link definition, using note on link.
You can also use note left on link, note right on link, note top on link,
note bottom on link if you want to change the relative position of the note with the label.
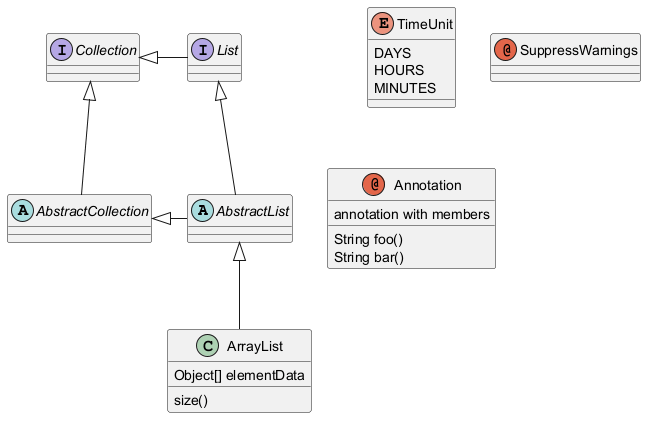
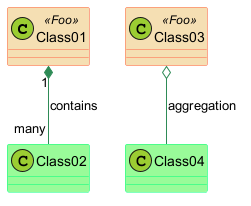
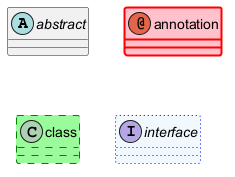
Abstract class and interface
You can declare a class as abstract using abstract or abstract class keywords.
The class will be printed in italic.
You can use the interface, annotation and enum keywords too.
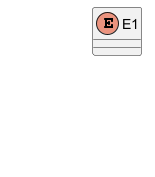
Hide attributes, methods...
You can parameterize the display of classes using the hide/show
command.
The basic command is: hide empty members. This
command will hide attributes or methods if they are empty.
Instead of empty members, you can use:
empty fieldsorempty attributesfor empty fields,empty methodsfor empty methods,fieldsorattributeswhich will hide fields, even if they are described,methodswhich will hide methods, even if they are described,memberswhich will hide fields and methods, even if they are described,circlefor the circled character in front of class name,stereotypefor the stereotype.
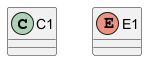
hide or show
keyword:
classfor all classes,interfacefor all interfaces,enumfor all enums,<<foo1>>for classes which are stereotyped with foo1,- an existing class name.
show/hide commands to define rules and
exceptions.

Hide classes
You can also use the show/hide commands to hide classes.
This may be useful if you define a large !included file,
and if you want to hide some classes after file inclusion.

Remove classes
You can also use the remove commands to remove classes.
This may be useful if you define a large !included file,
and if you want to remove some classes after file inclusion.

Hide, Remove or Restore tagged element or wildcard
You can put $tags (using $) on elements, then remove, hide or restore components either individually or by tags.
By default, all components are displayed:
hide $tag13components:
- or
remove $tag13components:

- or
remove $tag13 and restore $tag1components:
- or
remove * and restore $tag1components:

Hide or Remove unlinked class
By default, all classes are displayed:
hide @unlinkedclasses:
- or
remove @unlinkedclasses:
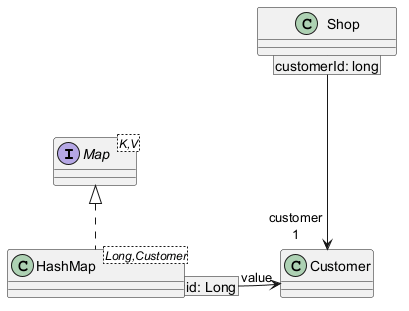
Use generics
You can also use bracket < and > to define generics usage in a class.
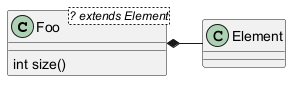
skinparam genericDisplay old command.
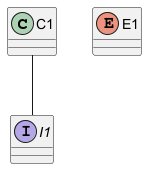
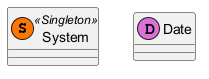
Specific Spot
Usually, a spotted character (C, I, E or A) is used for classes,
interface, enum and abstract classes.
But you can define your own spot for a class when you define the stereotype,
adding a single character and a color, like in this example:
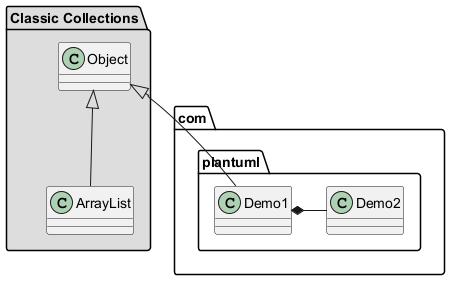
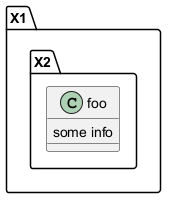
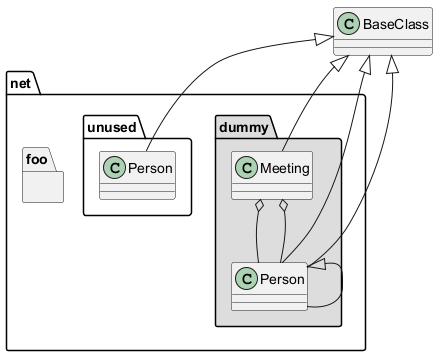
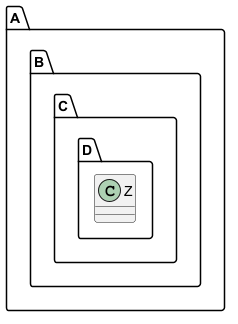
Packages
You can define a package using the
package keyword, and optionally declare a background color
for your package (Using a CSS color code or name).
Note that package definitions can be nested.
Packages style
There are different styles available for packages.
You can specify them either by setting a default style with the command : skinparam packageStyle,
or by using a stereotype on the package:

Namespaces
Starting with version 1.2023.2, PlantUML handles differently namespaces and packages.
There won't be any difference between namespaces and packages anymore: both keywords are now synonymous.
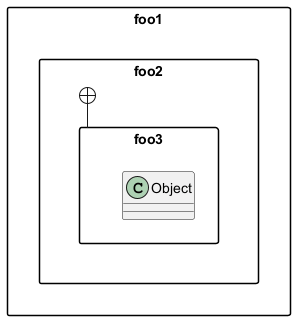
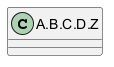
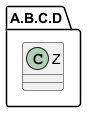
Automatic package creation
You can define another separator (other than the dot) using
the command : set separator ???.
set separator none.
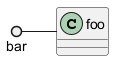
Lollipop interface
You can also define lollipops interface on classes, using the following
syntax:
bar ()- foobar ()-- foofoo -() bar
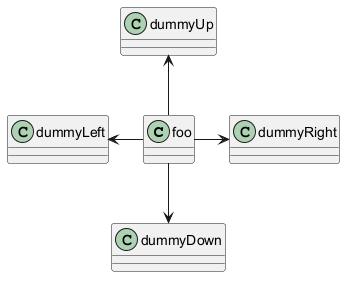
Changing arrows orientation
By default, links between classes have two dashes -- and are vertically oriented.
It is possible to use horizontal link by putting a single dash (or dot) like this:
left, right, up
or down keywords inside the arrow:
-d- instead of
-down-)
or the two first characters (-do-).
Please note that you should not abuse this functionality : Graphviz gives usually good results without tweaking.
And with the left to right direction parameter:

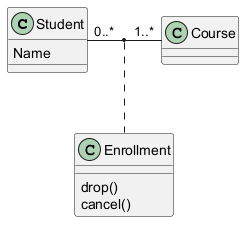
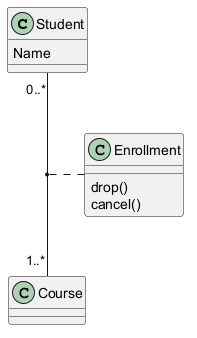
Association classes
You can define association class after that a relation has been
defined between two classes, like in this example:
Association on same class
Skinparam
You can use the skinparam
command to change colors and fonts for the drawing.
You can use this command :
- In the diagram definition, like any other commands,
- In an included file,
- In a configuration file, provided in the command line or the ANT task.
Skinned Stereotypes
You can define specific color and fonts for stereotyped classes.
_ below will cause all skinparams to be ignored,
see discord discussion
and issue #1932:
BackgroundColor_<<Foo>> Wheatskinparam stereotypeCBackgroundColor_<<Foo>> DimGray
Color gradient
You can declare individual colors for classes, notes etc using the # notation.
You can use standard color names or RGB codes in various notations, see Colors.
You can also use color gradient for background colors, with the following syntax:
two colors names separated either by:
|,/,\, or-
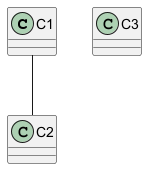
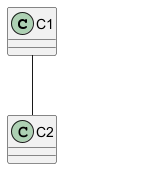
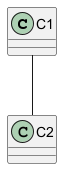
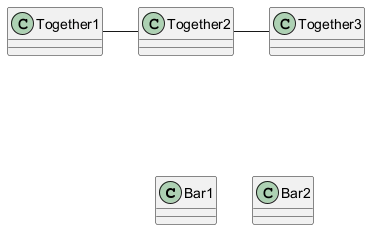
Help on layout
Sometimes, the default layout is not perfect...
You can use together keyword to group some classes together :
the layout engine will try to group them (as if they were in the same package).
You can also use hidden links to force the layout.
Splitting large files
Sometimes, you will get some very large image files.
You can use the page (hpages)x(vpages) command to split the generated image into several files :
hpages is a number that indicated the number of horizontal pages,
and vpages is a number that indicated the number of vertical pages.
You can also use some specific skinparam settings to put borders on splitted pages (see example).
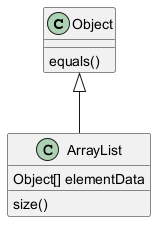
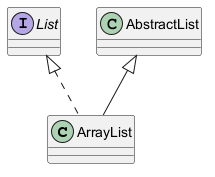
Extends and implements
It is also possible to use extends and implements keywords.
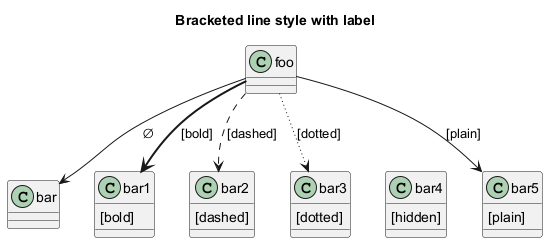
Bracketed relations (linking or arrow) style
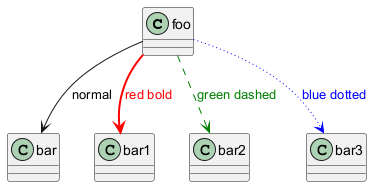
Line style
It's also possible to have explicitlybold, dashed, dotted, hidden or plain relation, links or arrows:- without label
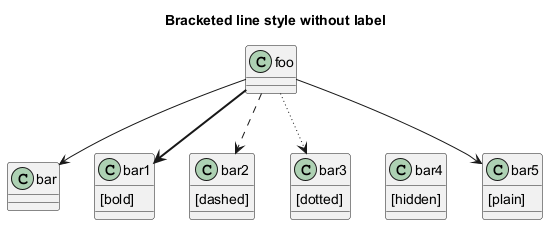
- with label
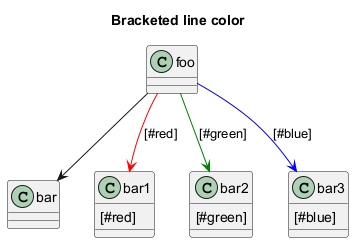
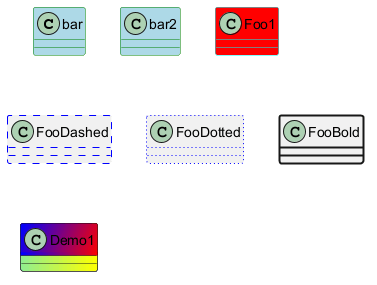
Line color
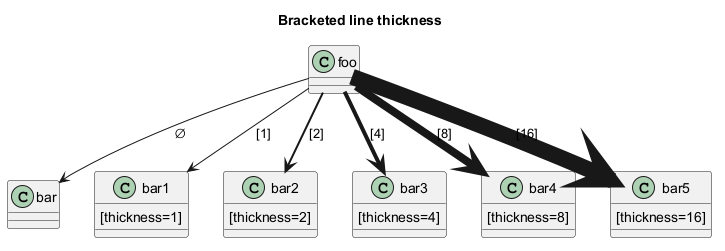
Line thickness
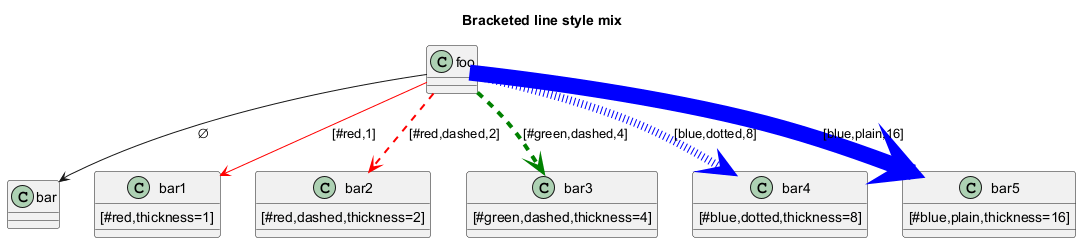
Mix
Change relation (linking or arrow) color and style (inline style)
You can change the color or style of individual relation or arrows using the inline following notation:
#color;line.[bold|dashed|dotted];text:color
Change class color and style (inline style)
You can change the color or style of individual class using the two following notations:
#color ##[style]color
#color), then line style and line color (##[style]color )
#[color|back:color];header:color;line:color;line.[bold|dashed|dotted];text:color

Arrows from/to class members
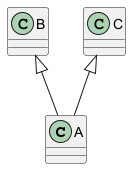
Grouping inheritance arrow heads
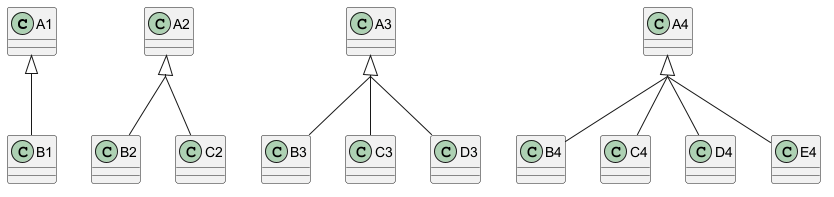
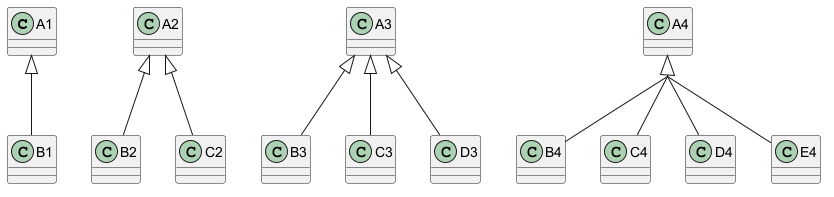
You can merge all arrow heads using the skinparam groupInheritance, with a threshold as parameter.
GroupInheritance 1 (no grouping)
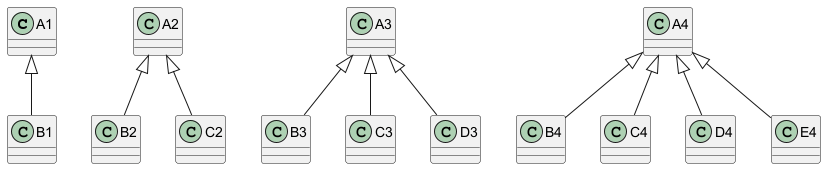
GroupInheritance 2 (grouping from 2)
GroupInheritance 3 (grouping only from 3)

GroupInheritance 4 (grouping only from 4)
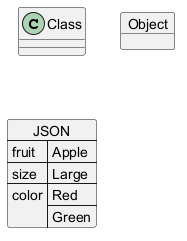
Display JSON Data on Class or Object diagram
Simple example
Packages and Namespaces Enhancement
[From V1.2023.2+, and V1.2023.5]

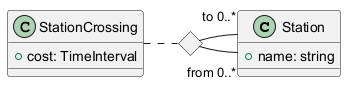
Qualified associations
Minimal example
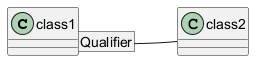
Another example
Change diagram orientation
You can change (whole) diagram orientation with:
top to bottom direction(by default)left to right direction
Top to bottom (by default)
With Graphviz (layout engine by default)
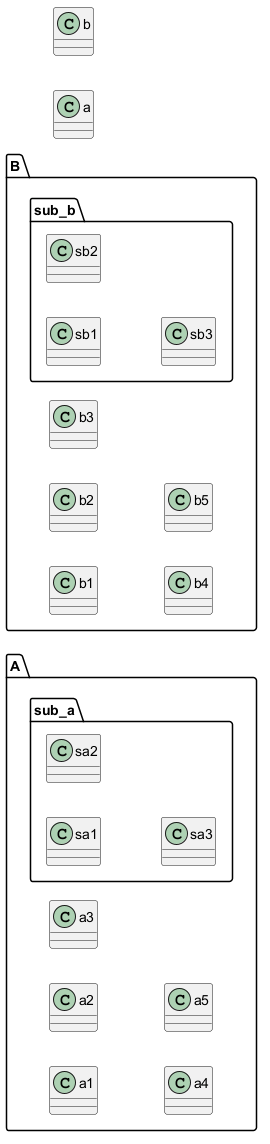
The main rule is: Nested element first, then simple element.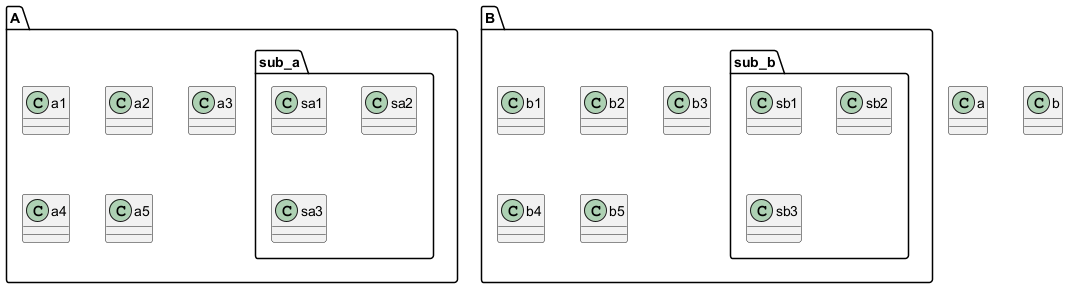
With Smetana (internal layout engine)
The main rule is the opposite: Simple element first, then nested element.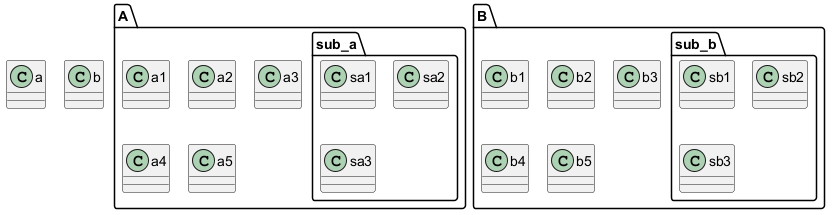
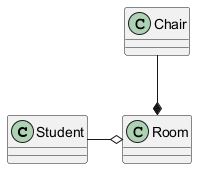
Left to right
With Graphviz (layout engine by default)
With Smetana (internal layout engine)

Role label to associations