New! Render PlantUML diagrams directly inside GitHub
with our official browser extension —
No server. No tokens. No tracking. Zero permissions but clipboard. —
Try it out and let us know what you think!
Diagramme de séquence
Les diagrammes de séquence dans PlantUML se définissent entièrement en texte. Vous décrivez les participants et les messages qu'ils échangent ; la mise en page, les espacements et les flèches sont générés automatiquement.- Texte en entrée, diagramme en sortie. Le code source est l'unique source de vérité : ce que vous lisez est exactement ce qui est rendu.
- Facile à modifier. Ajustez une ligne de texte plutôt que de déplacer des cadres.
- Itération rapide. Les outils d'aperçu en direct effectuent le rendu pendant que vous tapez, ce qui permet de repérer les erreurs au plus tôt.
 Exemples de base
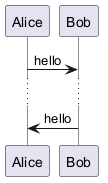
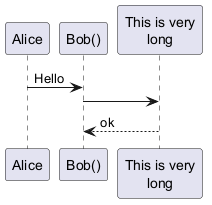
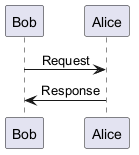
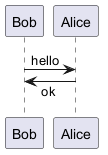
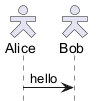
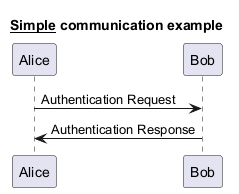
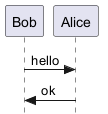
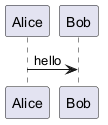
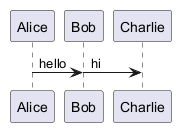
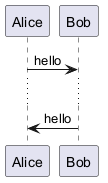
Dans les diagrammes de séquence PlantUML, la séquence -> dénote un message envoyé entre deux participants, qui sont automatiquement reconnus et n'ont pas besoin d'être déclarés au préalable.
Utilisez les flèches pointillées en employant la séquence -->, offrant une visualisation distincte dans vos diagrammes.
Pour améliorer la lisibilité sans affecter la représentation visuelle, utilisez des flèches inversées comme <- ou <--. Cependant, soyez conscient que ceci est spécifiquement pour les diagrammes de séquence et que les règles diffèrent pour d'autres types de diagrammes.
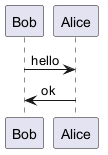
Déclaration d'un participant
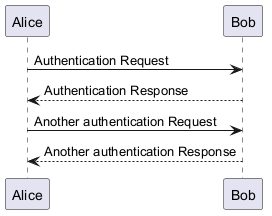
Si le mot-clé participant est utilisé pour déclarer un participant, il est possible d'exercer un contrôle accru sur ce participant.
L'ordre de déclaration sera l'ordre d'affichage(par défaut).
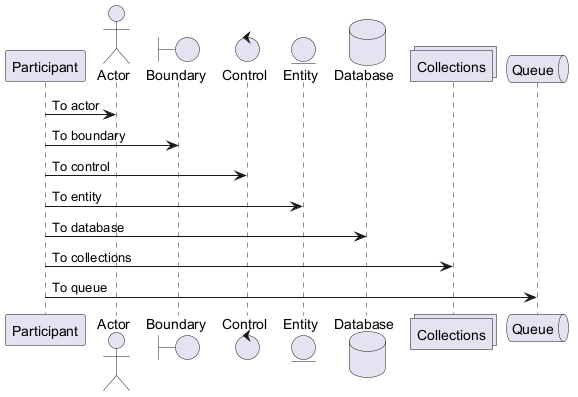
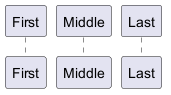
L'utilisation de ces autres mots-clés pour déclarer des participants modifiera la forme de la représentation du participant :
actorboundarycontrolentitydatabasecollectionsqueue
as.
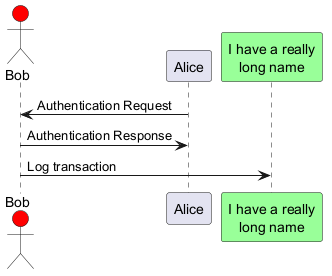
Vous pouvez également modifier la couleur de fond de l'acteur ou du participant
.
order pour personnaliser l'ordre d'affichage des participants.
WARNING
This translation need to be updated. WARNING
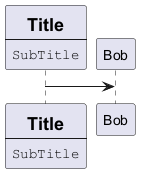
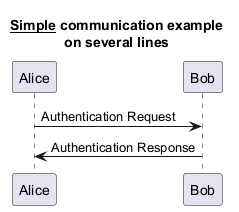
Déclarer un participant sur plusieurs lignes
Vous pouvez déclarer un participant sur plusieurs lignes.
Caractères non alphanumérique dans les participants
Si vous voulez mettre des charactères non alphanumériques, il est possible d'utiliser des guillemets. Et on peut utiliser le mot clé as pour définir un alias pour ces participants.
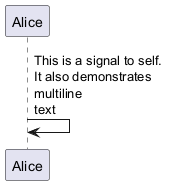
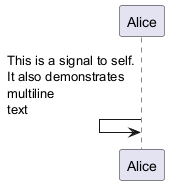
Message à soi-même
Un participant peut s'envoyer un message à lui-même.
Il est également possible d'avoir plusieurs lignes en utilisant \n
Alignement du texte
L'alignement du texte sur les flèches peut être défini sur left, right ou center en utilisant skinparam sequenceMessageAlign.
Vous pouvez également utiliser direction ou reverseDirection pour aligner le texte en fonction de la direction de la flèche. De plus amples détails et des exemples sont disponibles sur la page skinparam.
Texte du message de réponse sous la flèche
Vous pouvez placer le texte du message de réponse sous la flèche, avec la commandeskinparam responseMessageBelowArrow true
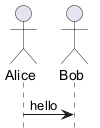
Change Actor style
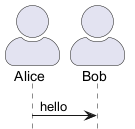
You can change the actor style from stick man (by default) to:
- an awesome man with the
skinparam actorStyle awesomecommand; - a hollow man with the
skinparam actorStyle hollowcommand.
Stick man (by default)
Awesome man
Hollow man
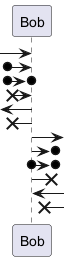
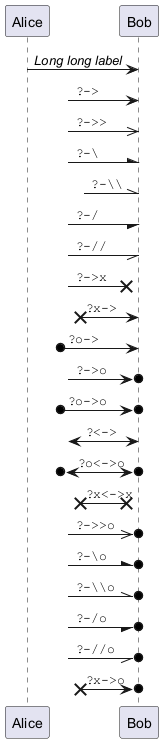
Autre style de flèches
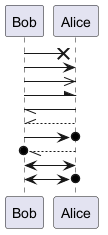
Vous pouvez changer les flèches de plusieurs façons :
- Pour indiquer un message perdu, terminer la flèche avec
x - Utiliser
\ou/à la place de<ou>pour avoir seulement la partie supérieure ou inférieure de la flèche. - Doubler un des caractères (par exemple,
>>ou//)pour avoir une flèche plus fine. - Utiliser
--à la place de-pour avoir des pointillés. - Utiliser "o" après la flèche
- Utiliser une flèche bi-directionnelle
<->
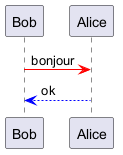
Changer la couleur des flèches
Changer la couleur d'une flèche ainsi:
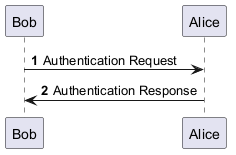
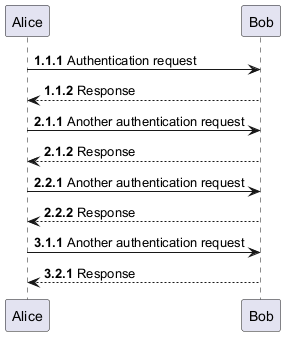
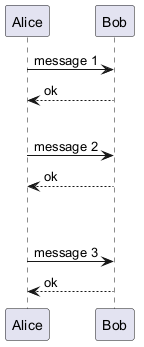
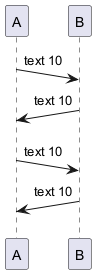
Numérotation séquentielle des messages
Le mot clé autonumber est utilisé pour
ajouter automatiquement un numéro incrémentiel aux messages
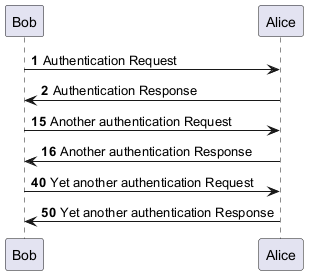
autonumber <start> et
également un incrément avec autonumber <start> <increment>.
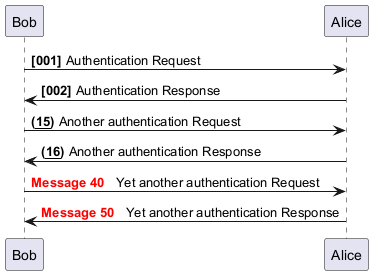
DecimalFormat
(0 signifie chiffre, # signifie chiffre et zéro si absent).
Vous pouvez utiliser une balise html dans le format
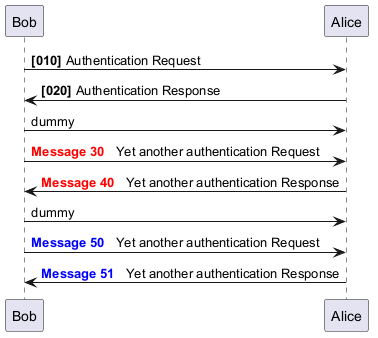
autonumber stop et
autonumber resume <increment> <format> pour respectivement interrompre et reprendre la numérotation automatique de
., ;, ,, : ou un mélange de ceux-ci. Par exemple : 1.1.1 ou 1.1:1.
Le dernier chiffre s'incrémente automatiquement.
Pour incrémenter le premier chiffre, utilisez : autonumber inc A. Pour incrémenter le deuxième chiffre, utilisez : autonumber inc B
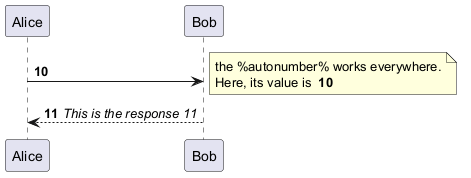
autonumber avec la variable %autonumber%
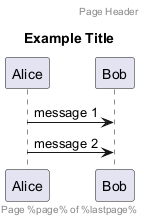
Titre, en-tête et pied de page de la page
Le mot clé title est utilisé pour ajouter un titre à la page.
Les pages peuvent afficher des en-têtes et des pieds de page en utilisant header et footer.
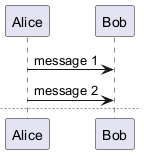
Découper un diagramme
Le mot clé newpage est utilisé pour découper un digramme en plusieurs images.
Vous pouvez mettre un titre pour la nouvelle page juste après le mot clé newpage.
Ceci est très pratique pour mettre de très longs digrammes sur plusieurs pages.
WARNING
This translation need to be updated. WARNING
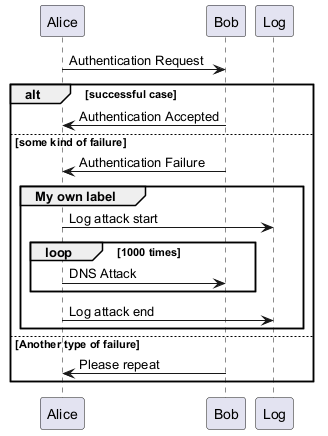
Regrouper les messages (cadres UML)
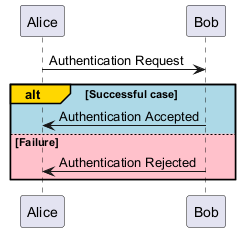
Il est possible de regrouper les messages dans un cadre UML à l'aide d'un des mot clés suivants:
alt/elseoptloopparbreakcriticalgroup, suivi par le texte à afficher
end est utilisé pour fermer le groupe. Il est aussi possible d'imbriquer les
groupes.
Terminer le cadre avec le mot-clé end.
Il est possible d'imbriquer les cadres.
WARNING
This translation need to be updated. WARNING
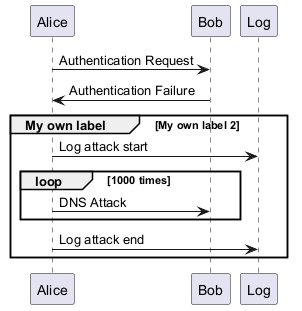
Étiquette secondaire de groupe
Pour les group, il est possible d'ajouter, entre[ et ], un texte ou une étiquette secondaire qui sera affiché dans l'en-tête
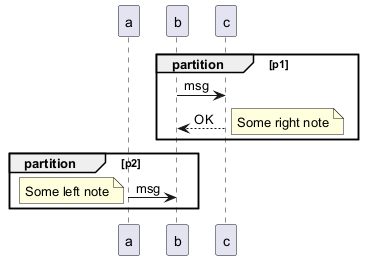
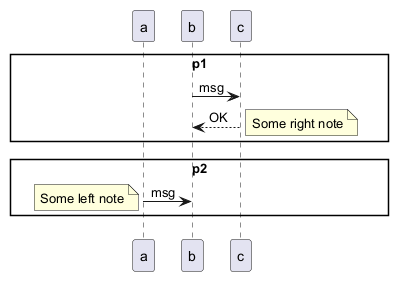
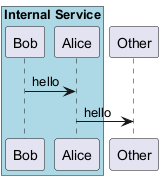
Partition across the entire width
You can use partition command to group messages horizontally across the entire width (full-width).
Messages are not grouped horizontally across the entire width (by default)
Grouping messages horizontally across the entire width (with teoz mode)
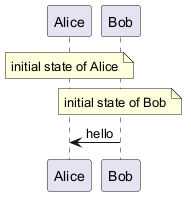
Note sur les messages
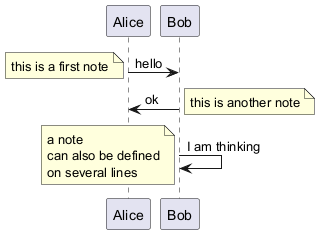
Pour attacher une note à un message, utiliser les mots-clés note left (pour une note à gauche)
ou note right (pour une note à droite) juste après le message.
Il est possible d'avoir une note sur plusieurs lignes avec le mot clé end note.
Encore plus de notes
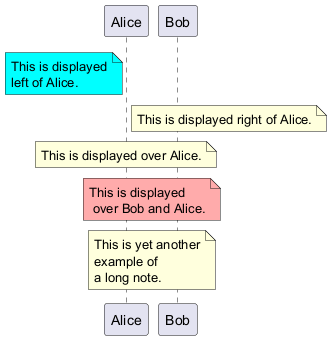
Il est aussi possible de mettre des notes placées par rapport aux participants.
Il est aussi possible de faire ressortir une note en changeant sa couleur de fond.
On peut aussi avoir des notes sur plusieurs lignes à l'aide du mot clé end note.
WARNING
This translation need to be updated. WARNING
Changer l'aspect des notes
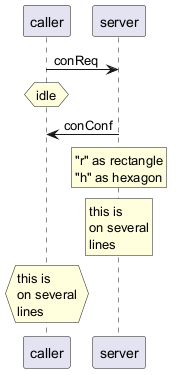
Vous pouvez préciser la forme géométrique des notes :
rnote: pour rectangulaire,hnote: pour hexagonale.
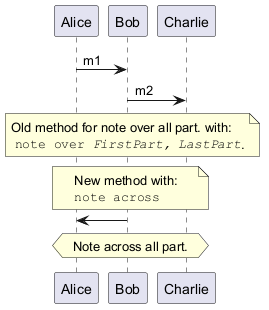
Note sur tous les participants [à travers]
Vous pouvez directement faire une note sur tous les participants, avec la syntaxe :
note across: note_description
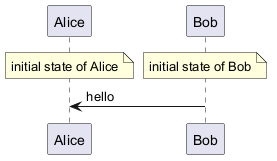
Plusieurs notes alignées au même niveau [/]
Vous pouvez faire plusieurs notes alignées au même niveau, avec la syntaxe /:
- sans
/(par défaut, les notes ne sont pas alignées)
- avec
/(les notes sont alignées)
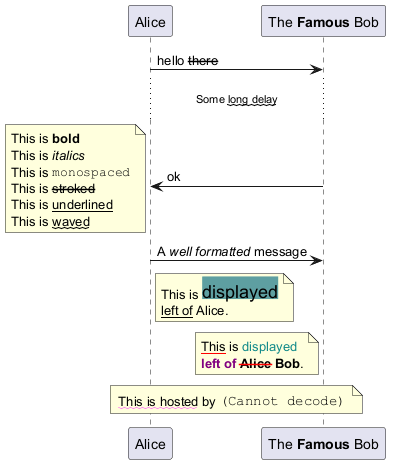
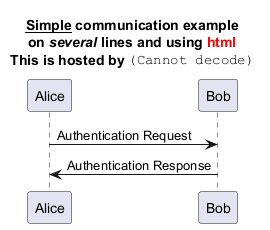
Créole (langage de balisage léger) et HTML
Il est également possible d'utiliser le formatage créole (langage de balisage léger):
WARNING
This translation need to be updated. WARNING
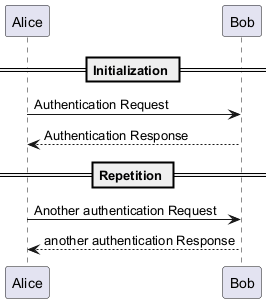
Diviseur ou séparateur
Si vous le souhaitez, vous pouvez diviser un diagramme en utilisant == comme séparateur pour
diviser votre diagramme en étapes logiques
Référence
Vous pouvez ajouter des références dans un diagramme, en utilisant le mot-clé ref over.
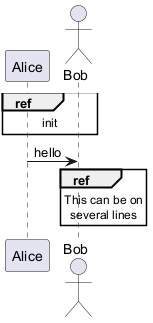
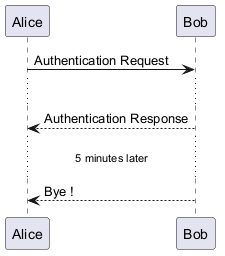
Retard
Utiliser ... pour indiquer le passage de temps arbitraire dans le diagramme.
Un message peut être associé à un retard.
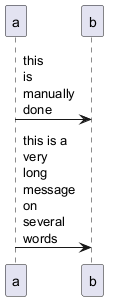
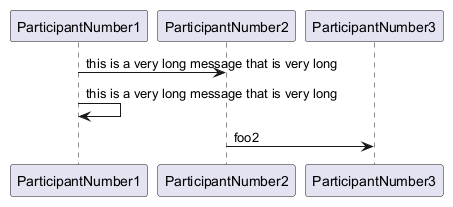
Habillage du texte
Pour interrompre de longs messages, vous pouvez ajouter manuellement \n dans votre texte.
Une autre option consiste à utiliser le paramètre maxMessageSize
Message text spans beyond the involved participants
You can use sequenceMessageSpan command to allow message text to span beyond the involved participants.
Without sequenceMessageSpan (by default)
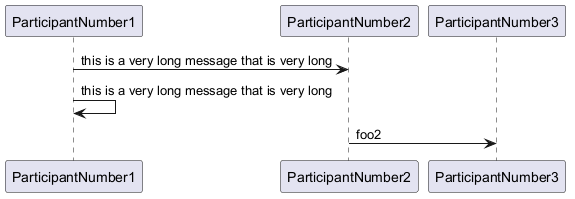
With sequenceMessageSpan (on teoz mode)
Séparation verticale
Utiliser ||| pour créer un espace vertical dans le diagramme.
Il est également possible de spécifier un nombre de pixels pour la séparation verticale.
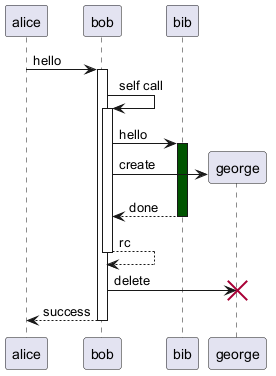
Lignes de vie
Vous pouvez utiliser activate et deactivate pour marquer
l'activation des participants.
Une fois qu'un participant est activé, sa ligne de vie apparaît.
Les ordres activate et deactivate s'applique sur le message situé
juste avant.
Le mot clé destroy sert à montrer la fin de vie d'un participant.
WARNING
This translation need to be updated. WARNING
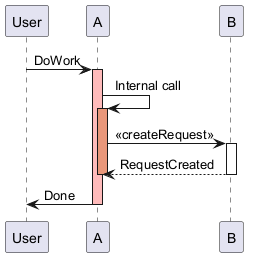
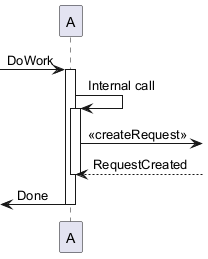
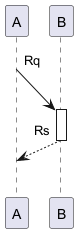
Retour
La commande return génère un message de retour avec un libellé facultatif.
Le point de retour est celui qui a provoqué l'activation la plus récente de la ligne de vie.
La syntaxe est return label où label, si elle est fournie, est toute chaîne acceptable pour les messages conventionnels.
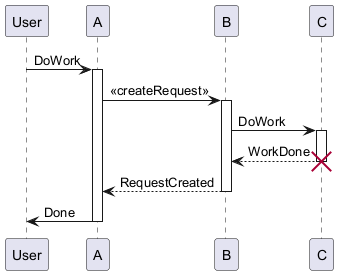
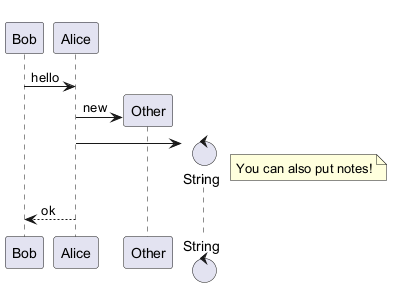
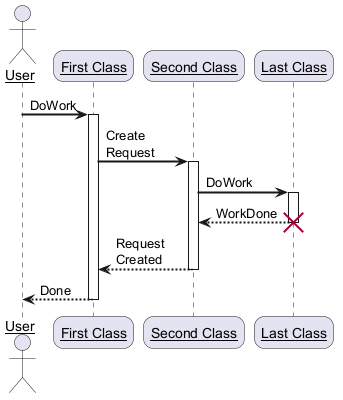
Création d'un participant
Vous pouvez utiliser le mot clé create juste avant la première réception
d'un message pour souligner le fait que ce message
crée effectivement ce nouvel objet.
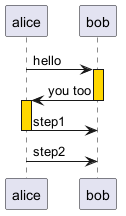
Syntaxe raccourcie pour l'activation, la désactivation, la création
Immédiatement après avoir spécifié le participant cible, la syntaxe suivante peut être utilisée :
++Activer la cible (une couleurpeut éventuellement suivre)--Désactiver la source**Créer une instance de la cible!!Détruire une instance de la cible

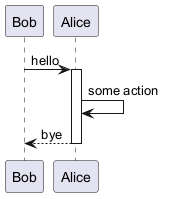
Messages entrant et sortant
Vous pouvez utiliser des flèches qui viennent de la droite ou de la gauche pour dessiner un sous-diagramme.
Il faut utiliser des crochets pour indiquer la gauche "[" ou
la droite "]" du diagramme.
WARNING
This translation need to be updated. WARNING
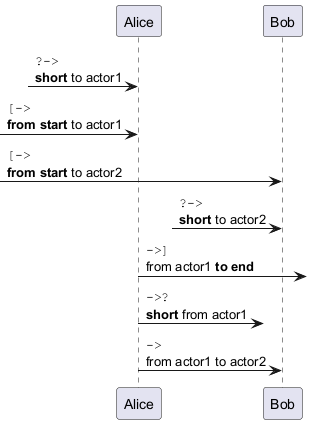
Flèches courtes pour les messages entrants et sortants
Vous pouvez avoir des flèches courtes en utilisant ?
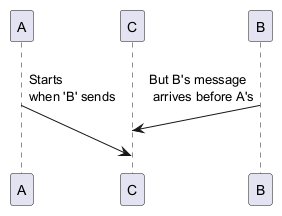
Anchors and Duration
En utilisant teoz il est possible d'ajouter des balises au diagramme et d'utiliser ces balises pour preciser la duree.
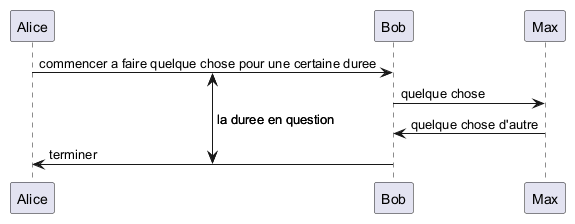
-P pour spécifier le pragma:
java -jar plantuml.jar -Pteoz=true
[Ref. issue-582]
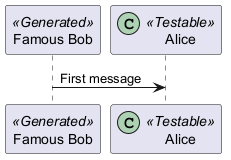
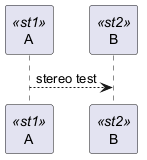
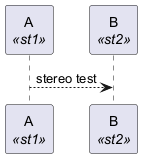
Stéréotypes et décoration
Il est possible de rajouter un stéréotype aux participants en utilisant "<<" et ">>".
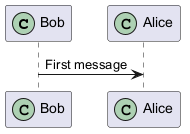
Dans le stéréotype, vous pouvez ajouter un caractère entouré d'un cercle coloré en utilisant la syntaxe (X,couleur).
guillemet:
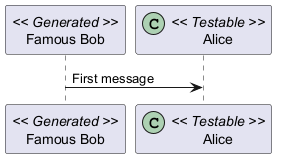
Position of the stereotypes
It is possible to define stereotypes position (top or bottom) with the command skinparam stereotypePosition.
Top postion (by default)
Bottom postion
Plus d'information sur les titres
Vous pouvez utiliser le formatage creole dans le titre.
\n dans la description.
title et
end title.
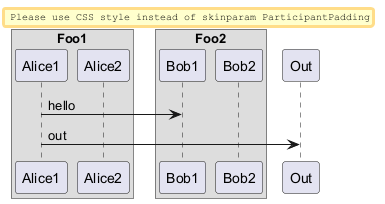
Cadre pour les participants
Il est possible de dessiner un cadre autour de certains participants, en utilisant les commandes
box et end box.
Vous pouvez ajouter un titre ou bien une
couleur de fond après le mot-clé box.
WARNING
This translation need to be updated. WARNING
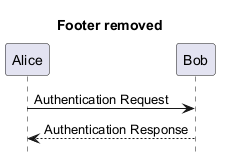
Supprimer les participants en pied de page
Vous pouvez utiliser le mot-clé hide footbox pour supprimer la partie basse du diagramme.
Personnalisation
Utilisez la commande skinparam pour changer la couleur et la mise en forme du texte du schéma.
Vous pouvez utiliser cette commande :
- Dans la définition du diagramme, comme pour les autres commandes,
- Dans un fichier inclus,
- Dans un fichier de configuration, renseigné dans la ligne de commande ou la tâche ANT.
WARNING
This translation need to be updated. WARNING
Changer le padding
Il est possible de changer certains paramètres du padding.
Appendix: Examples of all arrow type
Normal arrow

Itself arrow

Incoming and outgoing messages (with '[', ']')
Incoming messages (with '[')

Outgoing messages (with ']')

Short incoming and outgoing messages (with '?')
Short incoming (with '?')
Short outgoing (with '?')

SkinParameter spécifique
Par défaut

LifelineStrategy
- nosolid (par défaut)
- solid
skinparam lifelineStrategy solid

style strictuml
Pour être conforme à l'UML strict(pour le style de flèche : émet un triangle plutôt que des pointes de flèche pointues), vous pouvez utiliserskinparam style strictuml
WARNING
This translation need to be updated. WARNING
Masquer un participant non lié
Par défaut, tous les participants sont affichés

hide unlinked participant
Colorier un groupe de message
Il est possible de colorer un groupe de message
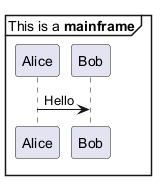
Mainframe
Slanted or odd arrows
You can use the (nn) option (before or after arrow) to make the arrows slanted, where nn is the number of shift pixels.
[Available only after v1.2022.6beta+]
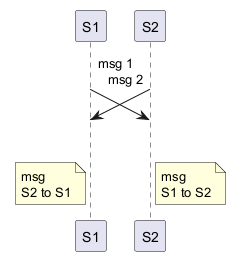
Parallel messages (with teoz)
You can use the & teoz command to display parallel messages:
Style for Solid Lifeline
By default
Solid Lifeline using style