New! Render PlantUML diagrams directly inside GitHub
with our official browser extension —
No server. No tokens. No tracking. Zero permissions but clipboard. —
Try it out and let us know what you think!
Diagramme d'état
Les diagrammes d'état fournissent une représentation visuelle des différents états dans lesquels un système ou un objet peut se trouver, ainsi que des transitions entre ces états. Ils sont essentiels pour modéliser le comportement dynamique des systèmes, en saisissant la manière dont ils réagissent à différents événements au fil du temps. Les diagrammes d'état décrivent le cycle de vie du système, ce qui facilite la compréhension, la conception et l'optimisation de son comportement. Utilisation de PlantUML pour créer des diagrammes d'état offre plusieurs avantages :- Langage basé sur le texte: Définir et visualiser rapidement les états et les transitions sans les inconvénients du dessin manuel.
- Efficacité et cohérence: Assurez une création de diagramme rationalisée et un contrôle de version facile.
- Polyvalence: S'intègre à diverses plates-formes de documentation et prend en charge plusieurs formats de sortie.
- Open-Source & Community Support: Soutenu par une communauté solide qui contribue continuellement à ses améliorations et offre des ressources inestimables.
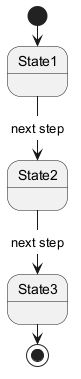
 Exemple simple
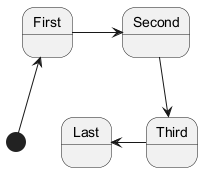
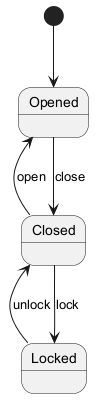
Vous devez utiliser [*] pour le début et la fin du diagramme d'état.
Utilisez --> pour les flèches.
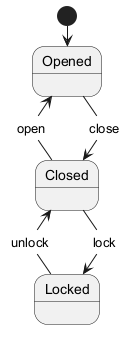
Autre rendu
Il est possible d'utiliser la directive hide empty description pour afficher l'état de façon plus compact.
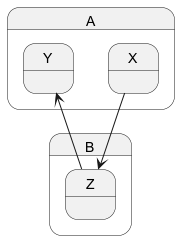
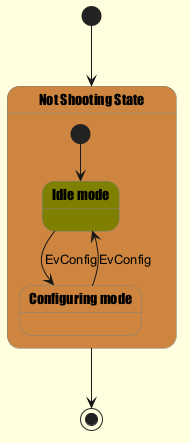
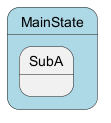
État composite
Un état peut également être composite. Vous devez alors le définir avec le mot-clé state
et des accolades.
Sous-état interne
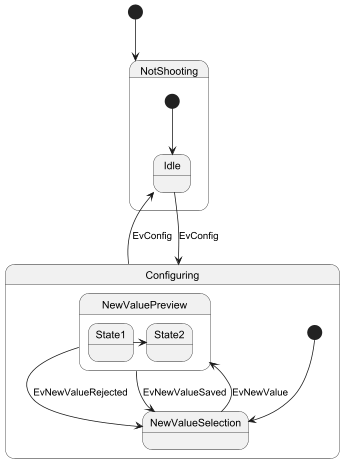
Lien entre sous-états
WARNING
This translation need to be updated. WARNING
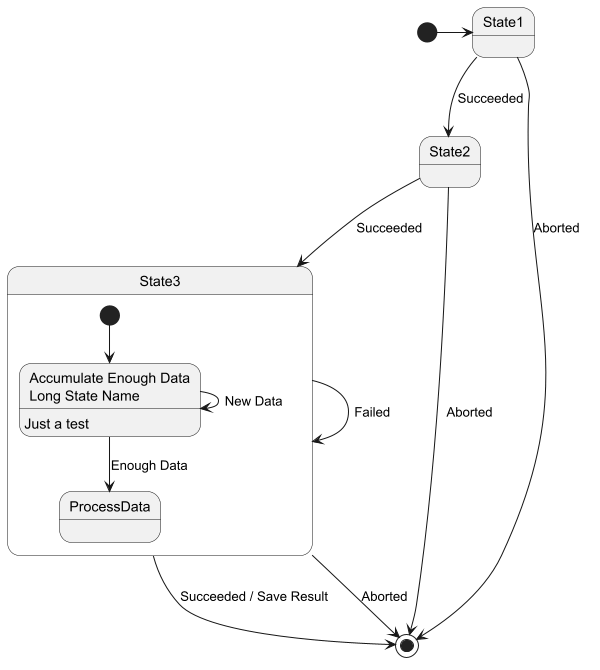
Nom long
Vous pouvez aussi utiliser le mot-clé state pour donner un nom avec des espaces à un état.
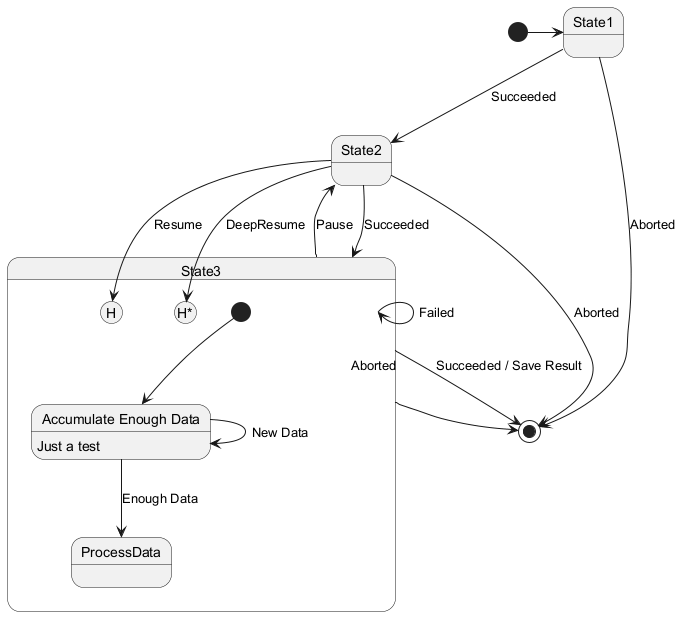
Historique de sous-état [[H], [H*]]
Vous pouvez utiliser [H] pour l'historique et [H*] pour l'historique profond d'un sous-état.
États parallèles [fork, join]
Il est possible d'afficher des états parallèles grâce aux stéréotypes <<fork>> et <<join>>.

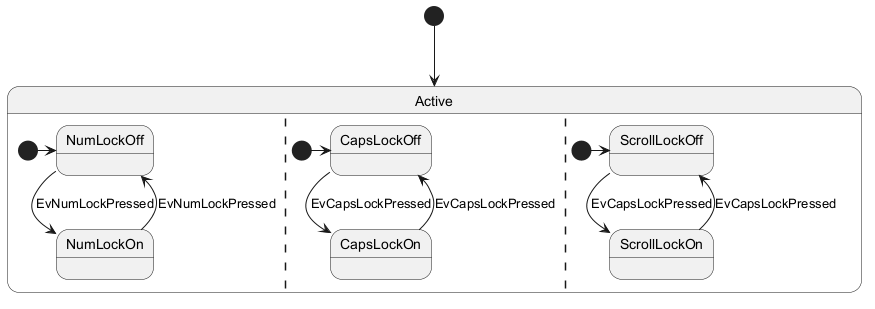
États concurrents [--, ||]
Vous pouvez définir un état concurrent dans un état composé en utilisant le symbole -- ou || comme séparateur.
Séparateur horizontal --
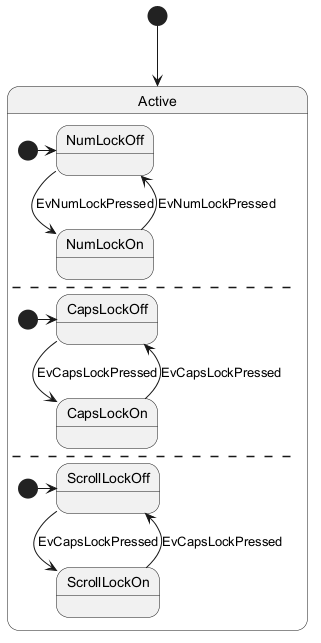
Séparateur vertical ||
WARNING
This translation need to be updated. WARNING
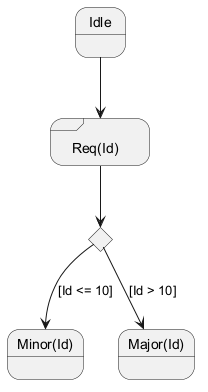
Conditionnel [choice]
Le stéréotype <<choice>> peut être utilisé pour signifier des états conditionnels.
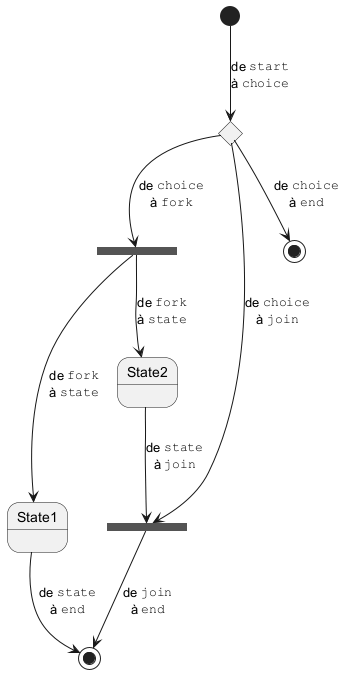
Exemple avec tous les stéréotypes [choice, fork, join, end]
WARNING
This translation need to be updated. WARNING
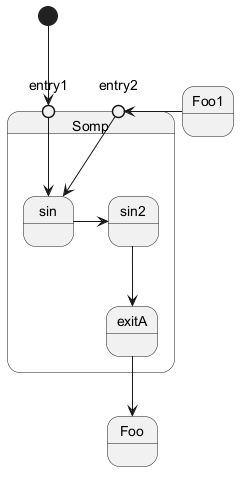
Petits cercles [entryPoint, exitPoint]
Vous pouvez ajouter de petits cercles [point] avec les stéréotypes <<entryPoint>> et <<exitPoint>> :
WARNING
This translation need to be updated. WARNING
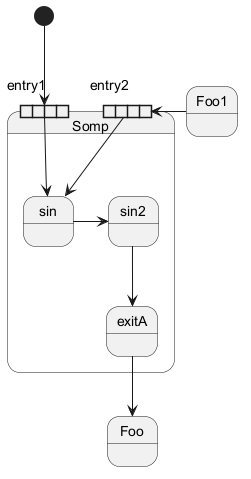
Petits carrés [inputPin, outputPin]
Vous pouvez ajouter de petits carrés [pin] avec les stéréotypes <<inputPin>> et <<outputPin>> :

WARNING
This translation need to be updated. WARNING
Multiples petits carrés [expansionInput, expansionOutput]
Vous pouvez ajouter de multiples petits carrés [expansion] avec les stéréotypes <<expansionInput>> et <<expansionOutput>> :
WARNING
This translation need to be updated. WARNING
Direction des flèches
Vous pouvez utiliser -> pour les flèches horizontales. Il est aussi possible de forcer la direction
de la flèche avec la syntaxe suivante:
-down->(flèche par défaut)-right->or->-left->-up->
-d- à la place de -down-) ou bien les deux premiers caractères
(-do-).
Veuillez noter qu'il ne faut pas abuser de cette fonction : Graphviz donne généralement de bons résultats sans peaufinage.
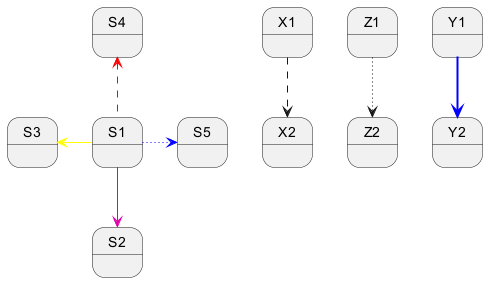
Changer la couleur ou le style des flèches
Vous pouvez modifier la couleur et/ou le style des flèches.
WARNING
This translation need to be updated. WARNING
Change head or tail of arrow line

Note
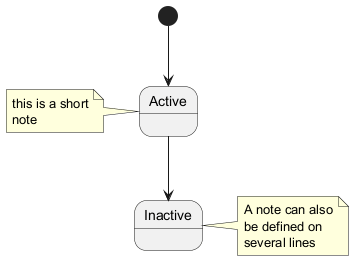
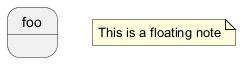
Vous pouvez définir des notes avec les mots clés suivant:
note left of, note right of, note top of, note bottom of
Vous pouvez aussi définir des notes sur plusieurs lignes.
WARNING
This translation need to be updated. WARNING
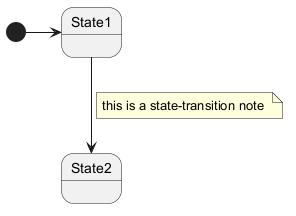
Note sur un lien
Vous pouvez ajouter une note sur un lien entre états avec le mot clé note on link.
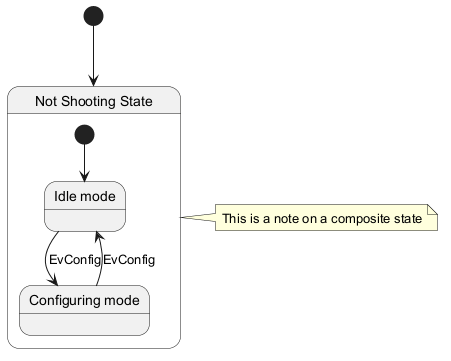
Plus de notes
Vous pouvez mettre des notes sur les états de composite
Changer les couleurs localement [Inline color]
Skinparam
Utilisez la commande skinparam pour changer la couleur et la mise en forme du texte du schéma.
Vous pouvez utiliser cette commande :
- Dans la définition du diagramme, comme pour les autres commandes,
- Dans un fichier inclus,
- Dans un fichier de configuration, renseigné dans la ligne de commande ou la tâche ANT.
Test de tous les skinparam spécifiques aux diagrammes d'état:
WARNING
This translation need to be updated. WARNING
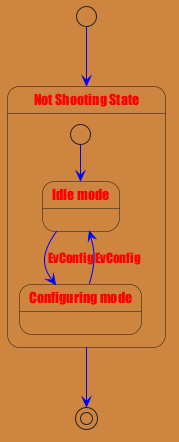
Changement de style
Vous pouvez changer de style
WARNING
This translation need to be updated. WARNING
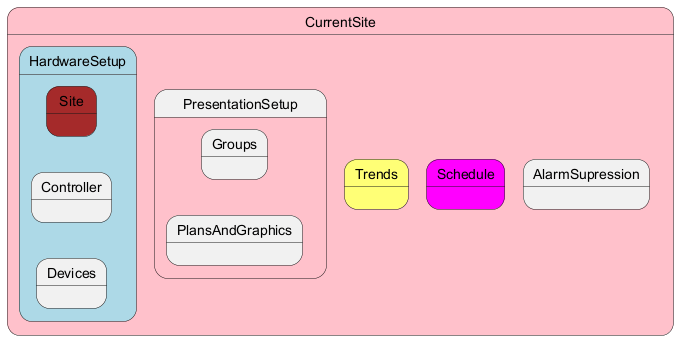
Modifier la couleur et le style d'un état (style en ligne)
Vous pouvez modifier la couleur ou le style d'un état individuel en utilisant la notation suivante
#color ##[style]color
#color), puis le style de ligne et la couleur de ligne (##[style]color )

#color;line:color;line.[bold|dashed|dotted];text:color
FIXME
🚩
text:color semble ne pas être pris en compte
FIXME


Alias
With State you can use alias, like:


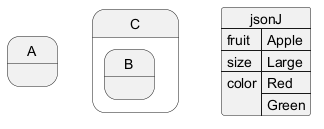
Display JSON Data on State diagram
Simple example
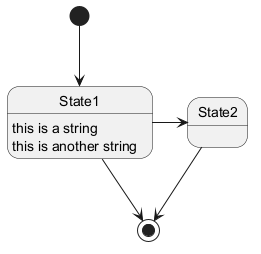
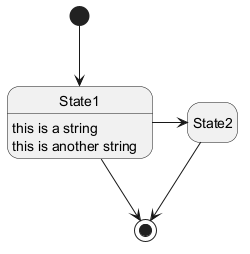
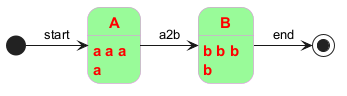
State description
You can add description to a state or to a composite state.

Style for Nested State Body
Mainframe and frame
Mainframe
You can use global mainframe: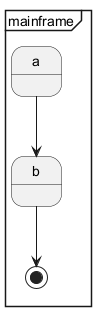
Frame
Or simply local frame: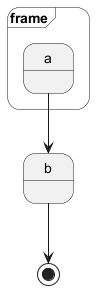
Specific SkinParameter
By default
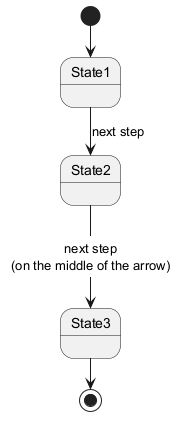
By default label are near arrow.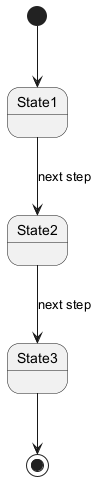
Edge Label Style
You can useskinparam stateDiagramEdgeLabelStyle node to put label on the middle of the arrow, and create a pseudo node.
Mix label defintion
By using localy-[node]-> form.