New! Render PlantUML diagrams directly inside GitHub
with our official browser extension —
No server. No tokens. No tracking. Zero permissions but clipboard. —
Try it out and let us know what you think!
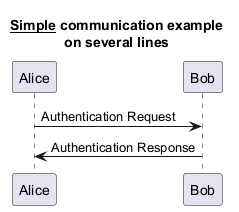
Diagrama de secuencia
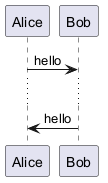
Los diagramas de secuencia en PlantUML se definen íntegramente como texto. Usted describe los participantes y los mensajes que intercambian; la disposición, el espaciado y las flechas se generan automáticamente.- Texto entra, diagrama sale. El código fuente es la única fuente de verdad: lo que usted lee es lo que se renderiza.
- Fácil de editar. Ajuste una línea de texto en lugar de arrastrar cuadros.
- Iteración rápida. Las herramientas de vista previa renderizan mientras escribe, así detecta los errores cuanto antes.
 Ejemplos básicos
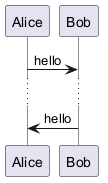
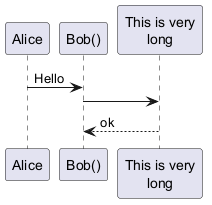
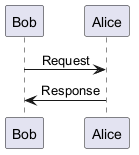
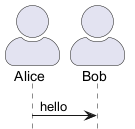
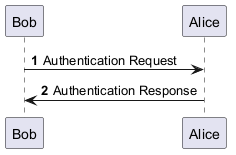
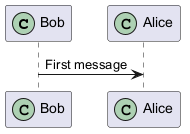
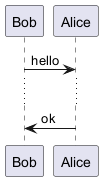
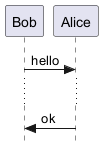
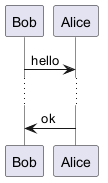
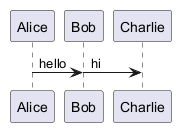
En los diagramas de secuencia PlantUML, la secuencia -> denota un mensaje enviado entre dos participantes, que son reconocidos automáticamente y no necesitan ser declarados de antemano.
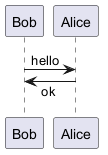
Utilice flechas punteadas empleando la secuencia -->, ofreciendo una visualización distinta en sus diagramas.
Para mejorar la legibilidad sin afectar a la representación visual, utilice flechas inversas como <- o <--. Sin embargo, tenga en cuenta que esto es específicamente para diagramas de secuencia y las reglas difieren para otros tipos de diagramas.
Declarando participantes
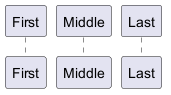
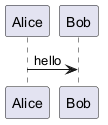
Es posible cambiar el orden de los participantes usando la palabra reservada participant.
También es posible el uso de otras palabras reservadas para declarar un participante:
actorboundarycontrolentitydatabasecollections
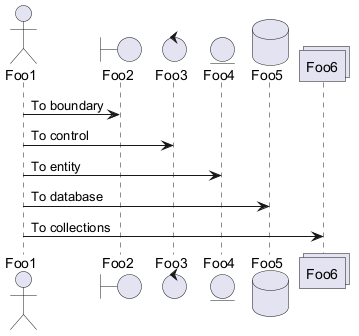
as.
También es posible cambiar el color de fondo de los actores o participantes.
orderkeyword to custom the print order of participant.
WARNING
This translation need to be updated. WARNING
Declarando participantes en múltiples líneas
Puedes declarar el participante en múltiples líneas.
Utilice caracteres que no sean letras en los participantes
Puede utilizar comillas para definir los participantes.
Y puede utilizar la palabra clave as para dar un alias a esos participantes.
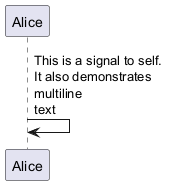
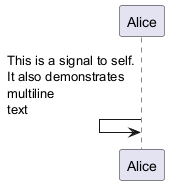
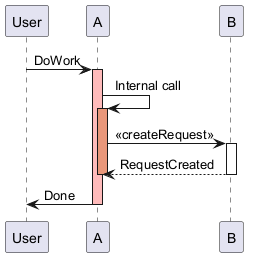
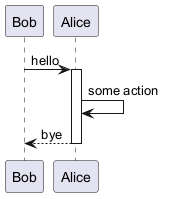
Mensaje a sí mismo
Un participante puede enviarse un mensaje a sí mismo.
También es posible tener varias líneas utilizando \n.
Alineación del texto
La alineación del texto en las flechas puede establecerse en left, right o center utilizando skinparam sequenceMessageAlign.
También puede utilizar direction o reverseDirection para alinear el texto dependiendo de la dirección de la flecha. Encontrará más detalles y ejemplos en la página skinparam.
Texto del mensaje de respuesta debajo de la flecha
Puede poner el texto del mensaje de respuesta debajo de la flecha, con el comandoskinparam responseMessageBelowArrow true.
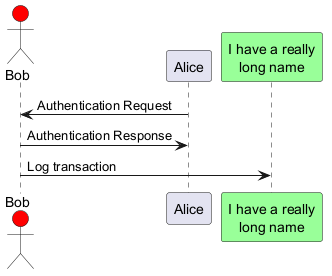
Change Actor style
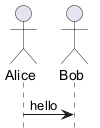
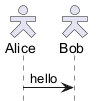
You can change the actor style from stick man (by default) to:
- an awesome man with the
skinparam actorStyle awesomecommand; - a hollow man with the
skinparam actorStyle hollowcommand.
Stick man (by default)
Awesome man
Hollow man
Cambiar estilo de la flecha
Puede cambiar el estilo de la flecha de diferentes formas:
- añade una
xal final para indicar un mensaje perdido - utilice
\o/en lugar de<o>para tener solo la parte inferior o superior de la flecha - repite la cabeza de la flecha (por ejemplo,
>>o//) para tener un trazo más fino - Utilice
--en lugar de-para obtener una flecha punteada. - añade una "o" al final de la cabeza de una flecha
- utilice flechas bidireccionales
<->
Cambiar el color de la flecha
Puede cambiar el color de flechas individuales usando la siguiente notación:
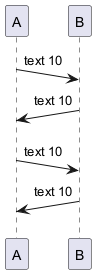
Numeración de la secuencia de mensajes
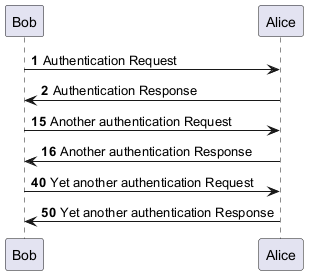
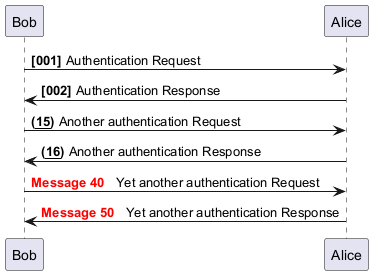
La palabra clave autonumber es usada para añadir automáticamente números a los mensajes.
autonumber //número inicial// , y también un incremento con autonumber //número inicial// //incremento//.
DecimalFormat (0 denota un dígito, # denota un digito y cero si está ausente).
Puedes usar alguna etiqueta HTML en el formato.
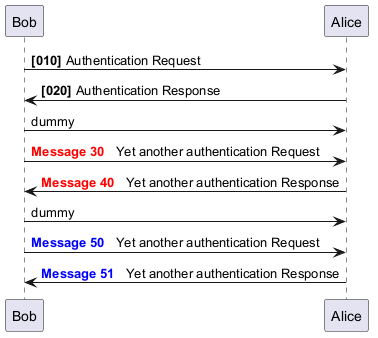
autonumber stop y
autonumber resume //increment// //format// para pausar y continuar la numeración automática, respectivamente.
WARNING
This translation need to be updated. WARNING
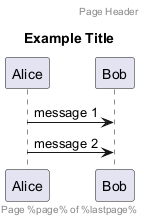
Título de página, encabezado y pie de página
La palabra clave title se utiliza para añadir un título a la página.
Las páginas pueden mostrar encabezados y pies de página utilizando header y footer.
Dividiendo diagramas
La palabra reservada newpage es empleada para dividir un diagrama en varias imágenes.
Puedes colocar un título para la página nueva justo después de la palabra reservada newpage .
Esto es bastante práctico con Word para devolver diagramas grandes en varias páginas.
WARNING
This translation need to be updated. WARNING
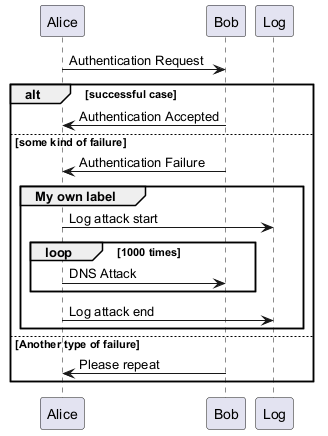
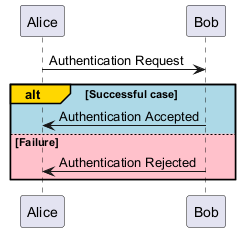
Agrupando mensajes
Es posible agrupar mensajes usando las siguientes palabras reservadas:
alt/elseoptloopparbreakcriticalgroup, seguida de un texto para mostrar
group).
La palabra reservada end es usada para cerrar el grupo.
Tenga en cuenta que es posible anidar grupos.
WARNING
This translation need to be updated. WARNING
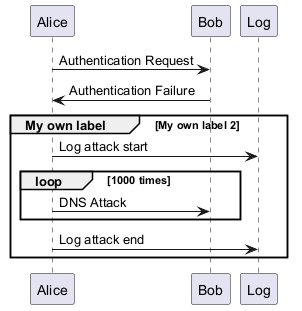
Etiqueta secundaria de grupo
Para group, es posible añadir, entre[ y ], un texto o etiqueta secundaria que se mostrará en la cabecera.
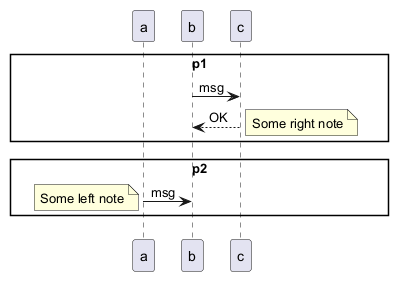
Partition across the entire width
You can use partition command to group messages horizontally across the entire width (full-width).
Messages are not grouped horizontally across the entire width (by default)
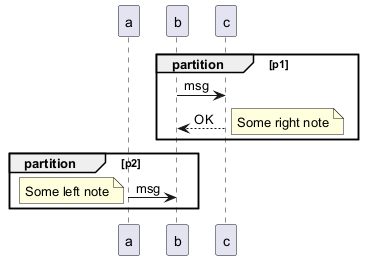
Grouping messages horizontally across the entire width (with teoz mode)
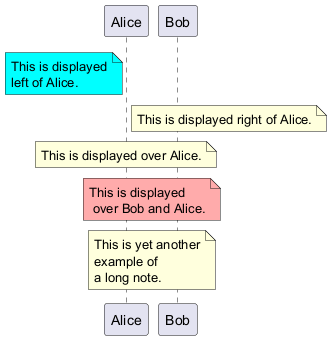
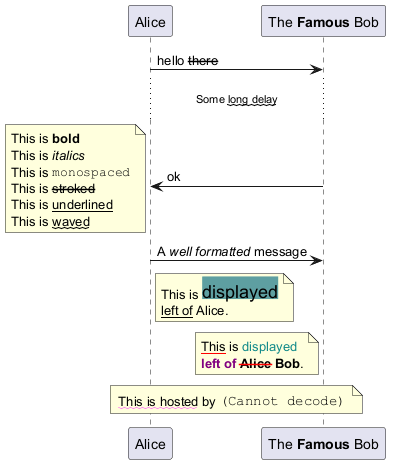
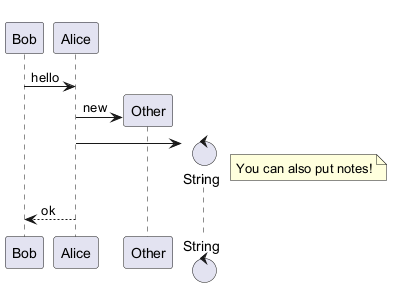
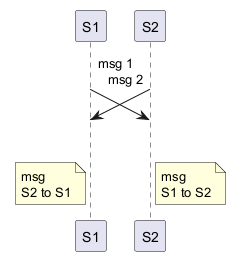
Notas en mensajes
Es posible colocar notas en mensajes usando las palabras reservadas note left
o note right inmediatamente después del mensaje.
Puedes tener una nota multi-líneas usando la palabra reservada end note .
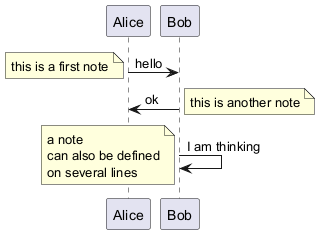
Algunas otras notas
También es posible colocar notas relativas al participante con las palabras reservadas <code>note
left of</code> , note right of o note over .
Es posible resaltar una nota cambiando su color de fondo.
También puedes tener una nota multi-líneas usando la palabra reservada end note .
WARNING
This translation need to be updated. WARNING
Cambiando el aspecto de las notas
Puedes usar las palabras reservadas hnote y rnote para cambiar el aspecto de las notas.
WARNING
This translation need to be updated. WARNING
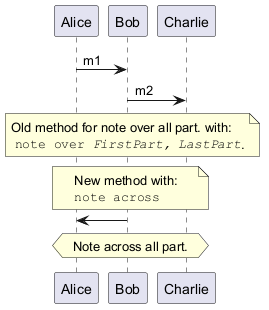
Nota sobre todos los participantes [a través de]
Puedes hacer directamente una nota sobre todos los participantes, con la sintaxis:
note across: note_description
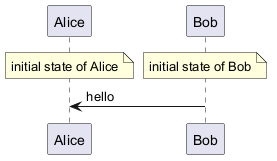
Varias notas alineadas al mismo nivel [/]
Puedes hacer que varias notas estén alineadas al mismo nivel, con la sintaxis /:
- sin
/(por defecto, las notas no están alineadas)
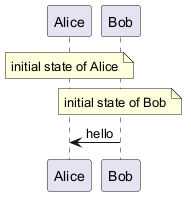
- con
/(las notas están alineadas)
Creole y HTML
También es posible usar sintexis de WikiCreole:
WARNING
This translation need to be updated. WARNING
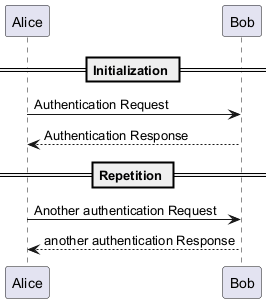
Divisor
Si quieres, puedes dividir un diagrama usando el separador == para separar su diagrama en pasos lógicos.
WARNING
This translation need to be updated. WARNING
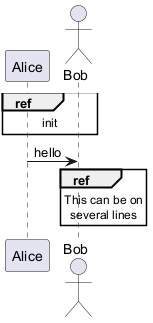
Referencia
Puedes referenciar en un diagrama utilizando la palabra clave ref over.
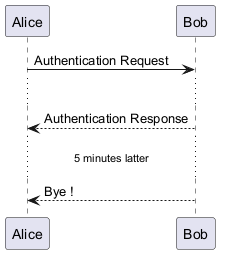
Retardo
Puedes usar ... para indicar un retardo en el diagrama.
Y también es posible colocar un mensaje con ese retardo.
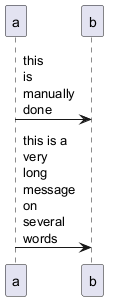
Ajuste del texto
Para interrumpir mensajes largos, puede añadir manualmente \n en el texto.
Otra opción es utilizar el ajuste maxMessageSize:
Message text spans beyond the involved participants
You can use sequenceMessageSpan command to allow message text to span beyond the involved participants.
Without sequenceMessageSpan (by default)
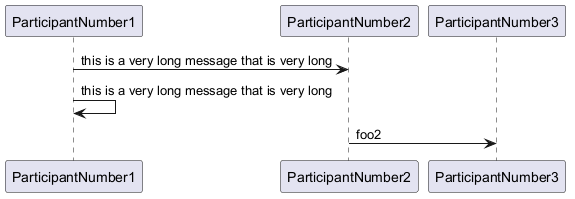
With sequenceMessageSpan (on teoz mode)
Espaciado
Puedes usar ||| para indicar espaciado en el diagrama.
También es posible especificar un número de píxel para ser usado.
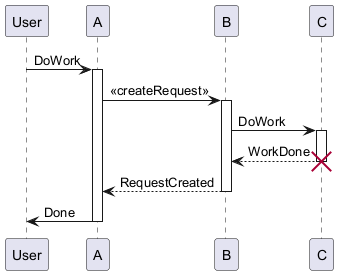
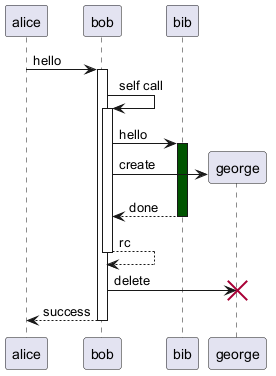
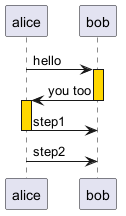
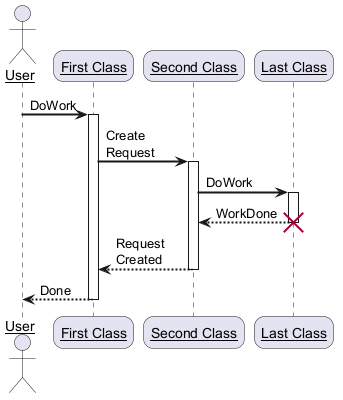
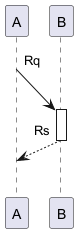
Activación y Destrucción de la Línea de vida
activate y deactivate son usados para denotar la activación de un participante.
Una vez que un participante es activado, su línea de vida aparece.
activate y deactivate aplica en el mensaje anterior.
destroy denota el final de la línea de vida de un participante.
WARNING
This translation need to be updated. WARNING
Retorno
El comando return genera un mensaje de retorno con una etiqueta de texto opcional.
El punto de retorno es el que causó la activación más reciente de la línea de vida.
La sintaxis es return label donde label si se proporciona es cualquier cadena aceptable para mensajes convencionales.
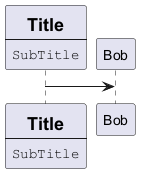
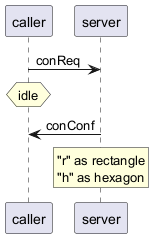
Creación de participante
Puedes usar la palabra reservada create justo antes de la primera recepción de un mensaje para recalcar el hecho de que ese mensaje se encuentra creando ese nuevo objeto.
Sintaxis abreviada para la activación, desactivación y creación
Inmediatamente después de especificar el participante de destino, se puede utilizar la siguiente sintaxis:
++ Activar el objetivo * (opcionalmente puede ir seguido de un color )
--Desactivar el origen**Crear una * instancia del objetivo!!Destruir una instancia del objetivo

Mensajes entrantes y salientes
Puedes usar flechas entrantes y salientes si quieres centrarte en una parte del diagrama.
Utilice corchetes para denotar el lado izquierdo "[" o el lado derecho "]" del diagrama.
WARNING
This translation need to be updated. WARNING
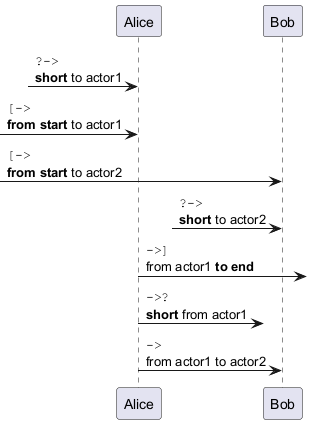
Flechas cortas para mensajes entrantes y salientes
Puedes tener flechas cortas con el uso de ?.
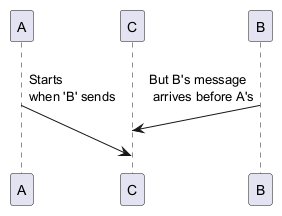
Anclas y duración
Con teoz es posible añadir anclas al diagrama y utilizar las anclas para especificar el tiempo de duración.
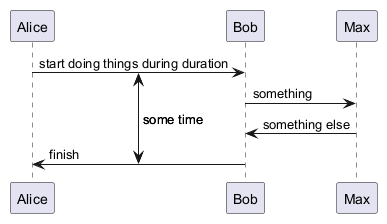
-P para especificar el pragma:
java -jar plantuml.jar -Pteoz=true
[Ref. issue-582]
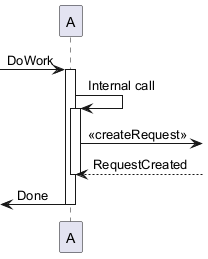
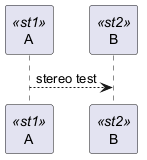
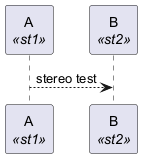
Estereotipos y marcas
Es posible añadir estereotipos a participantes usando <<
y >>.
En el estereotipo, puedes añadir un carácter marcado en un círculo coloreado usando la sintaxis (X,color).
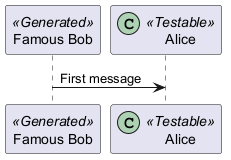
guillemet:
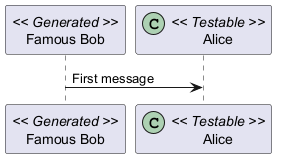
Position of the stereotypes
It is possible to define stereotypes position (top or bottom) with the command skinparam stereotypePosition.
Top postion (by default)
Bottom postion
Mayor información en los títulos
Puedes usar sintaxis de Creole en el título.
\n en la descripción del título.
title
y end title .
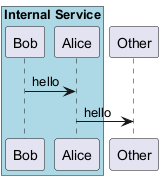
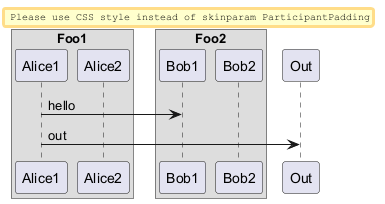
Entorno de participante
Es posible dibujar una caja alrededor de algunos participantes, usando los comandos box y end box .
Puedes añadir un título opcional o un color de fondo opcional, después de la palabra reservada box .
WARNING
This translation need to be updated. WARNING
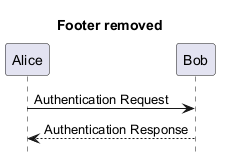
Removiendo pie de página
Puedes usar las palabras reservadas hide footbox para remover el pie de página del diagrama.
Personalización (Skinparam)
Puedes usar el comando skinparam para cambiar los colores y las fuentes de los dibujos
Puedes usar este comando:
- En la definición del diagrama, como cualquier otro comando,
- En un archivo incluido,
- En un archivo de configuración, proporcionado en la consola de comandos o en el ANT task.
WARNING
This translation need to be updated. WARNING
Cambiando el relleno
Es posible ajustar algunos parámetros de relleno
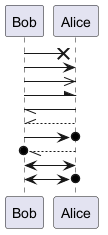
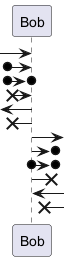
Appendix: Examples of all arrow type
Normal arrow

Itself arrow

Incoming and outgoing messages (with '[', ']')
Incoming messages (with '[')

Outgoing messages (with ']')

Short incoming and outgoing messages (with '?')
Short incoming (with '?')
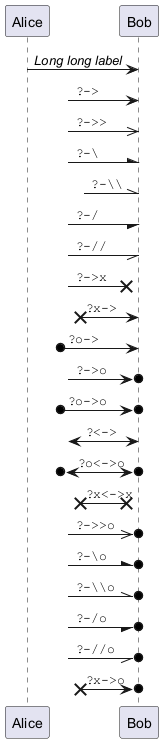
Short outgoing (with '?')

Specific SkinParameter
By default
Style strictuml
To be conform to strict UML (for arrow style: emits triangle rather than sharp arrowheads), you can use:skinparam style strictuml
LifelineStrategy
nosolid/solid
skinparam lifelineStrategy solid no longer works.
[Ref. QA-9016, QA-2794]
In order to have solid life line in sequence diagrams, you must now use style:
Hide unlinked participant
By default, all participants are displayed.

hide unlinked participant.
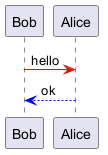
Color a group message
It is possible to color a group messages:
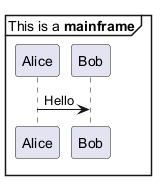
Mainframe
Slanted or odd arrows
You can use the (nn) option (before or after arrow) to make the arrows slanted, where nn is the number of shift pixels.
[Available only after v1.2022.6beta+]
Parallel messages (with teoz)
You can use the & teoz command to display parallel messages:
Style for Solid Lifeline
By default
Solid Lifeline using style