New! Render PlantUML diagrams directly inside GitHub
with our official browser extension —
No server. No tokens. No tracking. Zero permissions but clipboard. —
Try it out and let us know what you think!
유스케이스 다이어그램
유스케이스 다이어그램은 외부 액터가 시스템과 어떻게 상호작용하는지 보여줍니다. 누가 무엇을 하는지, 그리고 시스템이 어떤 기능을 제공하는지를 표현합니다. 기능 요구사항을 한눈에 파악할 수 있으며, 설계 초기 단계에서 이해관계자의 인식을 맞추는 데 유용합니다. PlantUML에서는 액터, 유스케이스, 그리고 그들 간의 관계를 텍스트로 기술합니다. 다이어그램은 자동으로 생성됩니다.- 텍스트 입력, 다이어그램 출력. 액터, 유스케이스, 관계를 몇 줄로 정의합니다.
- 리팩터링이 쉽습니다. 액터의 이름을 바꾸거나 유스케이스를 옮기는 작업은 한 줄만 수정하면 됩니다.
- 리포지토리에 함께 둡니다. 다이어그램은 문서화 대상 코드 옆에, 버전 관리하에 보관됩니다.
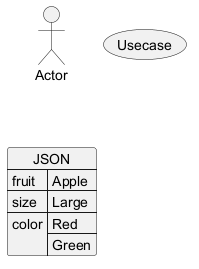
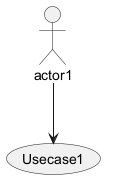
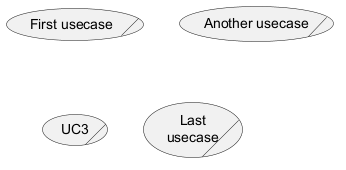
 유즈케이스
유즈케이스
유즈케이스는 (두개의 괄호는 원으로 보이기 때문에) 괄호로 싸서 표현합니다.
아니면 usecase 키워를 이용하여 정의할 수 있습니다.
그리고 as 키워드를 이용하여 별칭을 정의 할 수 있습니다.
별칭은 관계를 정의할 때 사용됩니다.

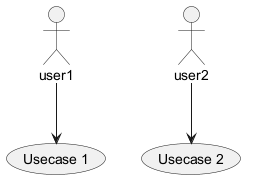
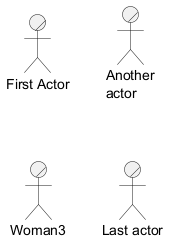
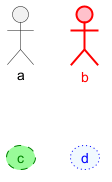
Actors
액터를 정의하는 이름은 콜론 사이에 있습니다.
Actor 키워드를 사용하여 액터를 정의할 수도 있습니다.
별칭은 as 키워드로 할당될 수 있으며,
나중에 관계를 정의할 때 액터 이름 대신 사용될 수 있습니다.
다음 예에서 액터 정의는 선택 사항임을 알 수 있습니다.

Change Actor style
You can change the actor style from stick man (by default) to:
- an awesome man with the
skinparam actorStyle awesomecommand; - a hollow man with the
skinparam actorStyle hollowcommand.
Stick man (by default)
Awesome man
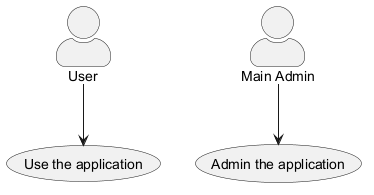
Hollow man

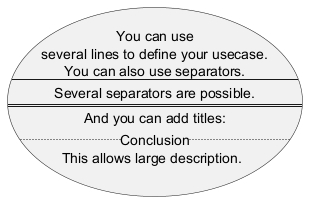
유즈케이스 종류
If you want to have description on several lines, you can use quotes.
You can also use the following separators: --
.. == __.
And you can put titles within the separators.
WARNING
This translation need to be updated. WARNING
Use package
You can use packages to group actors or use cases.
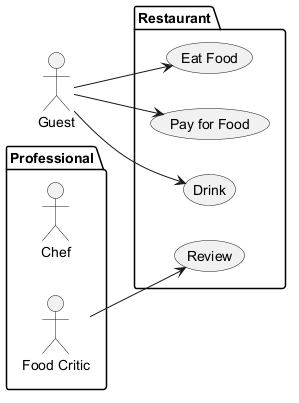
rectangle to change the display of the package.
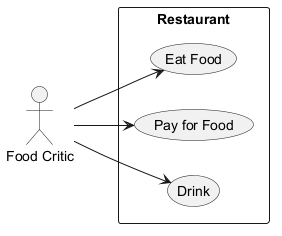
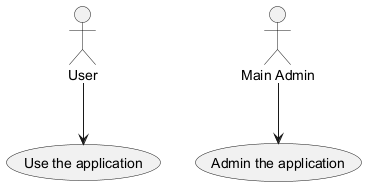
기본 예제
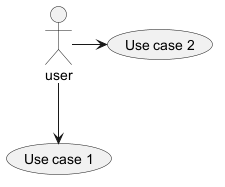
To link actors and use cases, the arrow --> is
used.
The more dashes - in the arrow, the longer the
arrow.
You can add a label on the arrow, by adding a :
character in the arrow definition.
In this example, you see that User has not been defined
before, and is used as an actor.
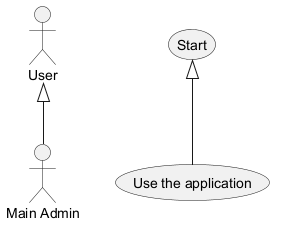
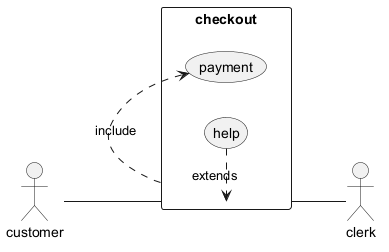
Extension
If one actor/use case extends another one, you can use the symbol <|--.
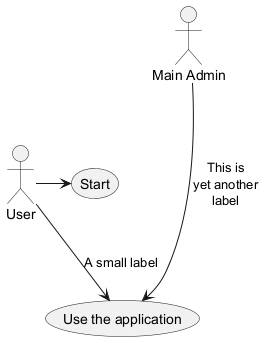
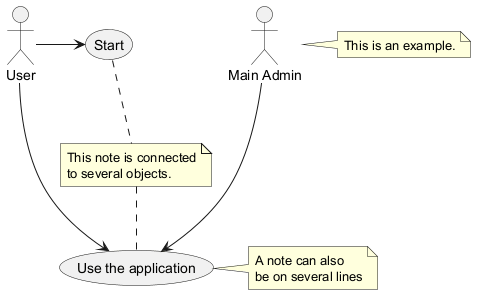
Using notes
You can use the note left of , note right of ,
note top of , note bottom of keywords to
define notes related to a single object.
A note can be also define alone with the note
keywords, then linked to other objects using the .. symbol.
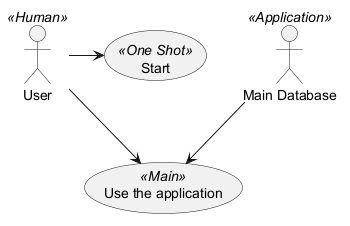
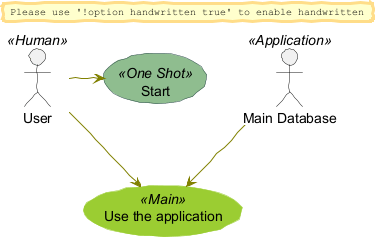
Stereotypes
You can add stereotypes while defining actors and use cases using <<
and >>.
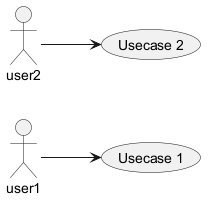
화살표 방향 변경
기본적으로, 클래스간의 링크는 대쉬2개 -- 로 표시하고 수직방향이다.
다음 처럼 대쉬1개 (혹은 점)을 넣어서 수평방향 링크를 사용할 수 있다:

left, right, up
or down keywords inside the arrow:
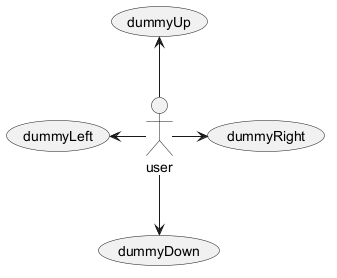
-d- instead of
-down-)
or the two first characters (-do-).
Please note that you should not abuse this functionality : Graphviz gives usually good results without
tweaking.
Splitting diagrams
The newpage keywords to split your diagram into several pages or images.
Left to right direction
The general default behavior when building diagram is top to bottom.
left to right direction command.
The result is often better with this direction.
Skinparam
You can use the skinparam
command to change colors and fonts for the drawing.
You can use this command :
- In the diagram definition, like any other commands,
- In an included file,
- In a configuration file, provided in the command line or the ANT task.
WARNING
This translation need to be updated. WARNING
Complete example
Business Use Case
You can add / to make Business Use Case.
Business Usecase
Business Actor
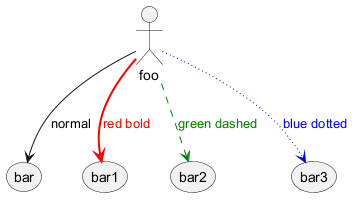
Change arrow color and style (inline style)
You can change the color or style of individual arrows using the inline following notation:
#color;line.[bold|dashed|dotted];text:color
Change element color and style (inline style)
You can change the color or style of individual element using the following notation:
#[color|back:color];line:color;line.[bold|dashed|dotted];text:color
Display JSON Data on Usecase diagram
Simple example