New! Render PlantUML diagrams directly inside GitHub
with our official browser extension —
No server. No tokens. No tracking. Zero permissions but clipboard. —
Try it out and let us know what you think!
ステートダイアグラム
ステートダイアグラムは、システムまたはオブジェクトが存在しうるさまざまな状態、およびそれらの状態間の遷移を視覚的に表現します。これらは、システムが時間の経過とともに異なるイベントにどのように応答するかを捉え、システムの動的な動作をモデリングする上で不可欠です。ステートダイアグラムはシステムのライフサイクルを描写し、その挙動を理解、設計、最適化するのを容易にします。 PlantUML を使用してステートダイアグラムを作成することは、いくつかの利点を提供します:- テキストベースの言語:手描きの手間なく、迅速に状態と遷移を定義し、視覚化します。
- 効率と一貫性:ダイアグラムの作成を効率的に行い、簡単なバージョンコントロールを確保します。
- 多様性:さまざまなドキュメンテーションプラットフォームと統合し、複数の出力フォーマットをサポートします。
- オープンソース&コミュニティサポート:強力なコミュニティにサポートされ、絶えずその強化に貢献し、貴重なリソースを提供します。
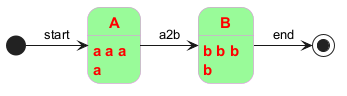
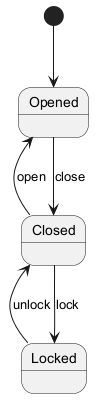
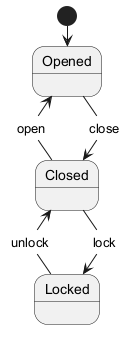
 簡単なステート
ステート図の始点と終点は、 [*] で示します。
矢印は、 --> で示します。
ステートの表現を変える
hide empty descriptionを使用し、ステート枠をシンプルにできます。
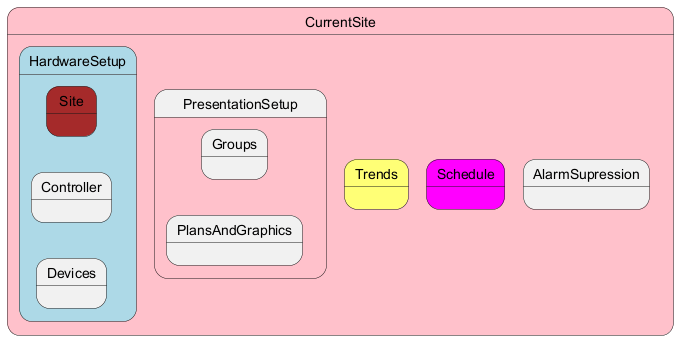
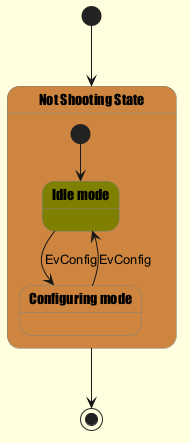
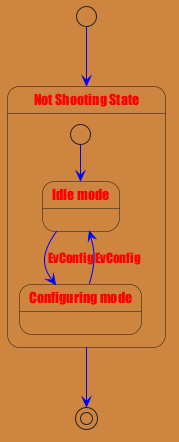
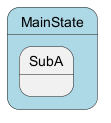
合成状態
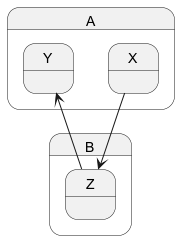
状態は合成することもできます。キーワードstateと中括弧を使用して定義します。
内部サブ状態
サブ状態からサブ状態へ
WARNING
This translation need to be updated. WARNING
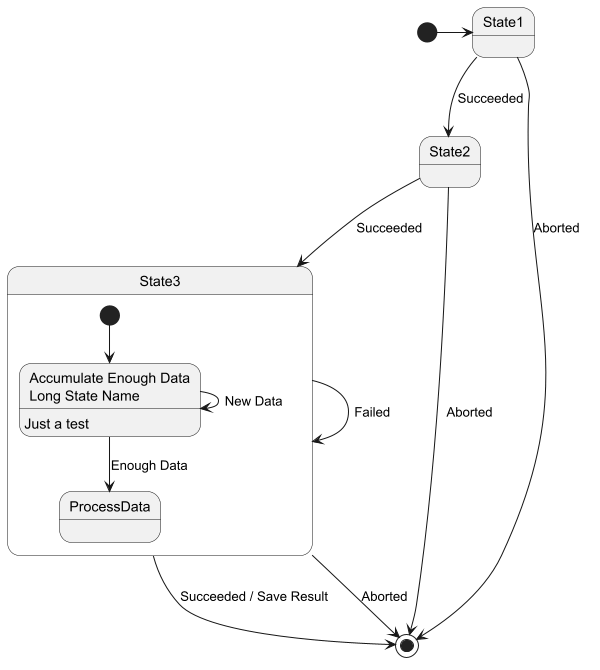
長い名前
キーワードstateによって、状態についての長めの記述を使用することができます。
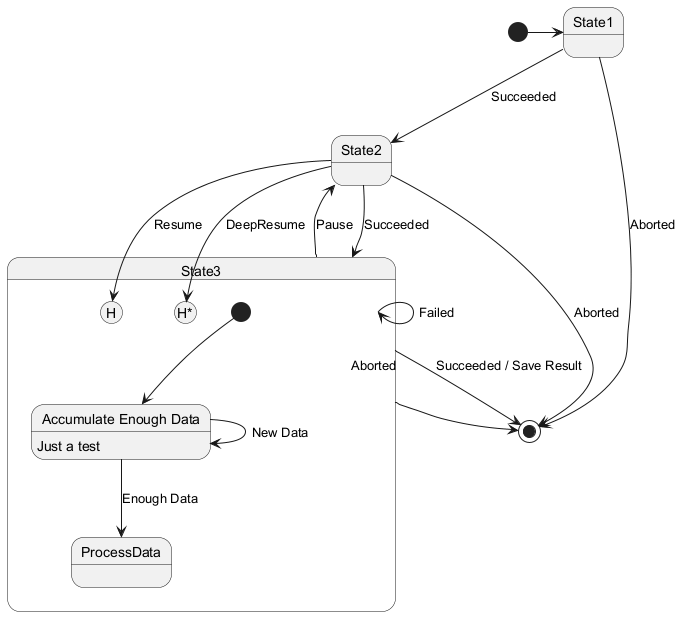
履歴
[H]でサブ状態の履歴、[H*]でサブ状態の深い履歴(deep history)を定義します。
フォーク(非同期実行)
<<fork>> と <<join>> stereotypesを使うことで、フォークノードとジョインノードを表せます。

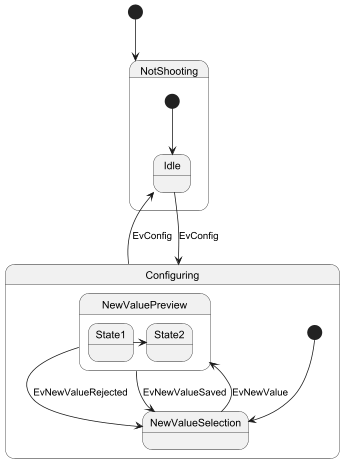
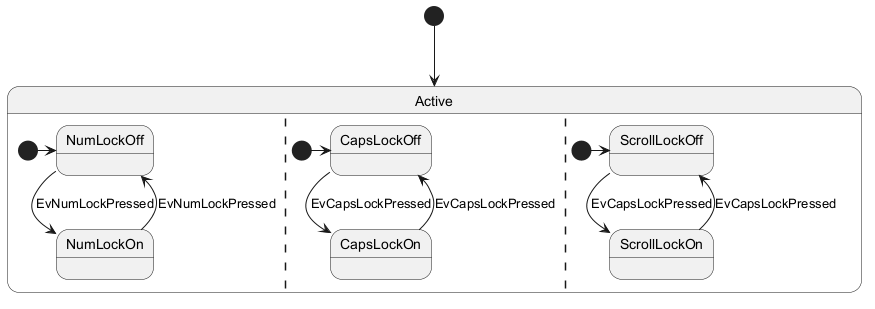
同時状態
記号--または|| で分離することで、合成状態の中に同時状態を定義することができます。
水平セパレータ--
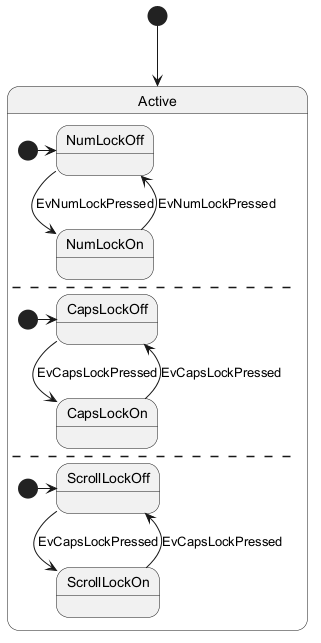
垂直セパレータ||
WARNING
This translation need to be updated. WARNING
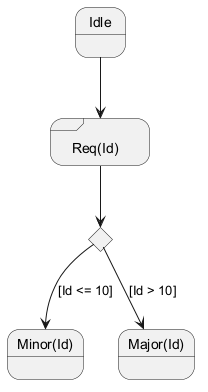
条件
<<choice>>ステレオタイプで条件付きの状態を表すことができます。
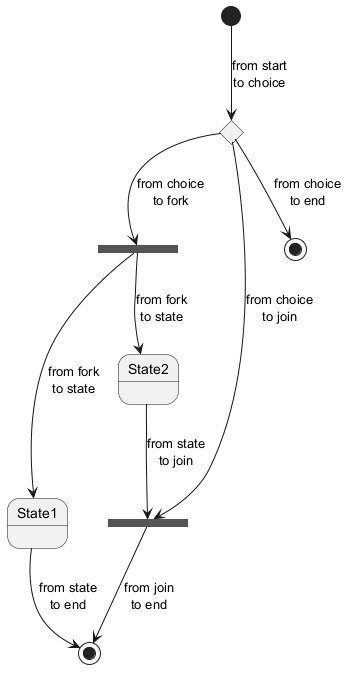
全ステレオタイプの例(choice, fork, join, end)
WARNING
This translation need to be updated. WARNING
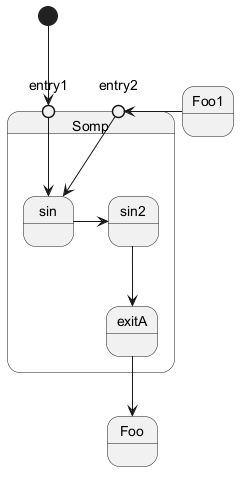
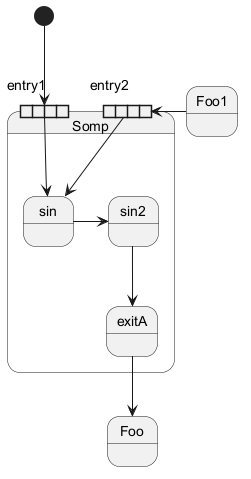
入場点と退場点
<<entryPoint>>ステレオタイプで入場点、<<exitPoint>>ステレオタイプで退場点を追加することができます。
WARNING
This translation need to be updated. WARNING
入力ピンと出力ピン
<<inputPin>>ステレオタイプで入力ピン、<<outputPin>>ステレオタイプで出力ピンを追加することができます。

WARNING
This translation need to be updated. WARNING
展開
<<expansionInput>>と<<expansionOutput>>ステレオタイプにより、展開(expansion)を追加することができます。
WARNING
This translation need to be updated. WARNING
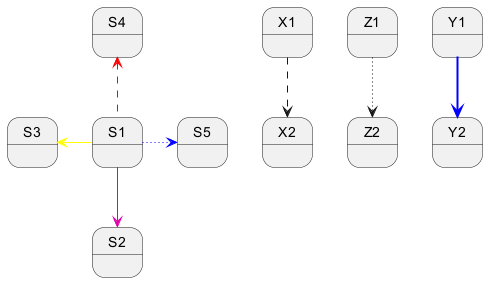
矢印の方向
記号->を水平矢印として使用でき、以下の構文を使用することで、矢印の方向を指定することができます。
-down->or-->-right->or->(デフォルトの矢印)-left->-up->
-down-の代わりに-d-)、または2文字(-do-)を使用することで、矢印の記述を短くすることができます。
この機能を乱用しないよう注意しなくてはいけません:通常、Graphvizは微調整なしでよい結果をもたらしてくれます。
線の色とスタイルを変更する
線の色とスタイルを変更することができます。
WARNING
This translation need to be updated. WARNING
Change head or tail of arrow line

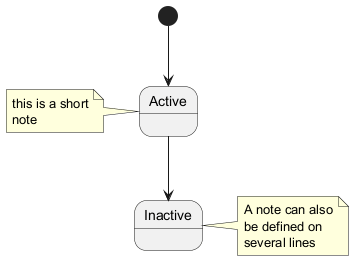
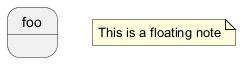
注釈
キーワード
note left of, note right of, note top of, note bottom of
を使用して注釈を定義することができます。
また、複数行の注釈を定義することもできます。
WARNING
This translation need to be updated. WARNING
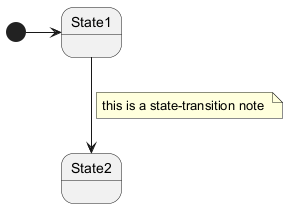
リンクへの注釈
note on linkキーワードで、状態遷移(リンク)に注釈を追加することができます。
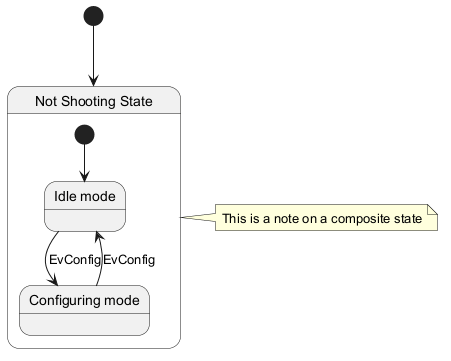
その他の注釈
合成状態にも注釈をつけることができます。
インライン色指定
skinparam
skinparam コマンドを使用すると、ダイアグラムの色やフォントを変更できます。
このコマンドは以下の場面で使用できます。
- 他のコマンドと同様にダイアグラム定義内で
- インクルードされたファイル内
- コマンドラインやAntタスクで指定された設定ファイル内
すべての状態遷移図特有のskinparamのテスト
WARNING
This translation need to be updated. WARNING
スタイル変更
スタイルを変更できます。
WARNING
This translation need to be updated. WARNING
状態の色とスタイルを変更する(インラインスタイル)
個別の状態ごとに色とスタイルを変更するには、次の記法を使用します:
#color ##[style]color
#color)を書き、次に線のスタイルと色(##[style]color )を書きます。

#color;line:color;line.[bold|dashed|dotted];text:color
FIXME
🚩
text:color seems not to be taken into account
FIXME


別名
aliasを使用して状態に別名を付けることができます:


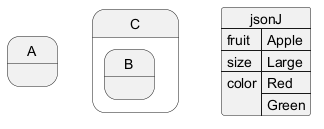
Display JSON Data on State diagram
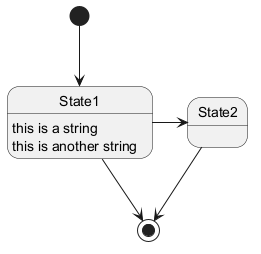
Simple example
State description
You can add description to a state or to a composite state.

Style for Nested State Body
Mainframe and frame
Mainframe
You can use global mainframe: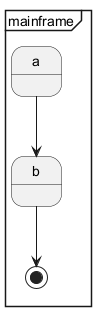
Frame
Or simply local frame: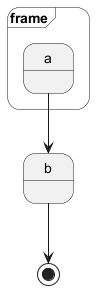
Specific SkinParameter
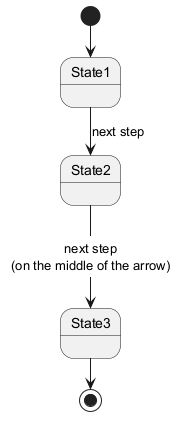
By default
By default label are near arrow.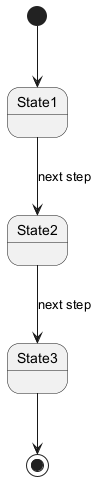
Edge Label Style
You can useskinparam stateDiagramEdgeLabelStyle node to put label on the middle of the arrow, and create a pseudo node.
Mix label defintion
By using localy-[node]-> form.